A coffee table is the kind of furniture that gets used without a second thought. It’s where cups of coffee are set down, snacks are served, laptops perch for late-night work, and sometimes it even doubles as a footrest. Because it takes on so many roles, a coffee table needs to be sturdy, practical, and inviting. Building your own gives you the freedom to decide how it looks and how it fits into your home. One of the most rewarding DIY projects is pairing scaffold boards with hairpin legs. The result is a table that feels rustic yet modern, substantial yet light, and full of character.
The Style of the Coffee Table and Where It Belongs
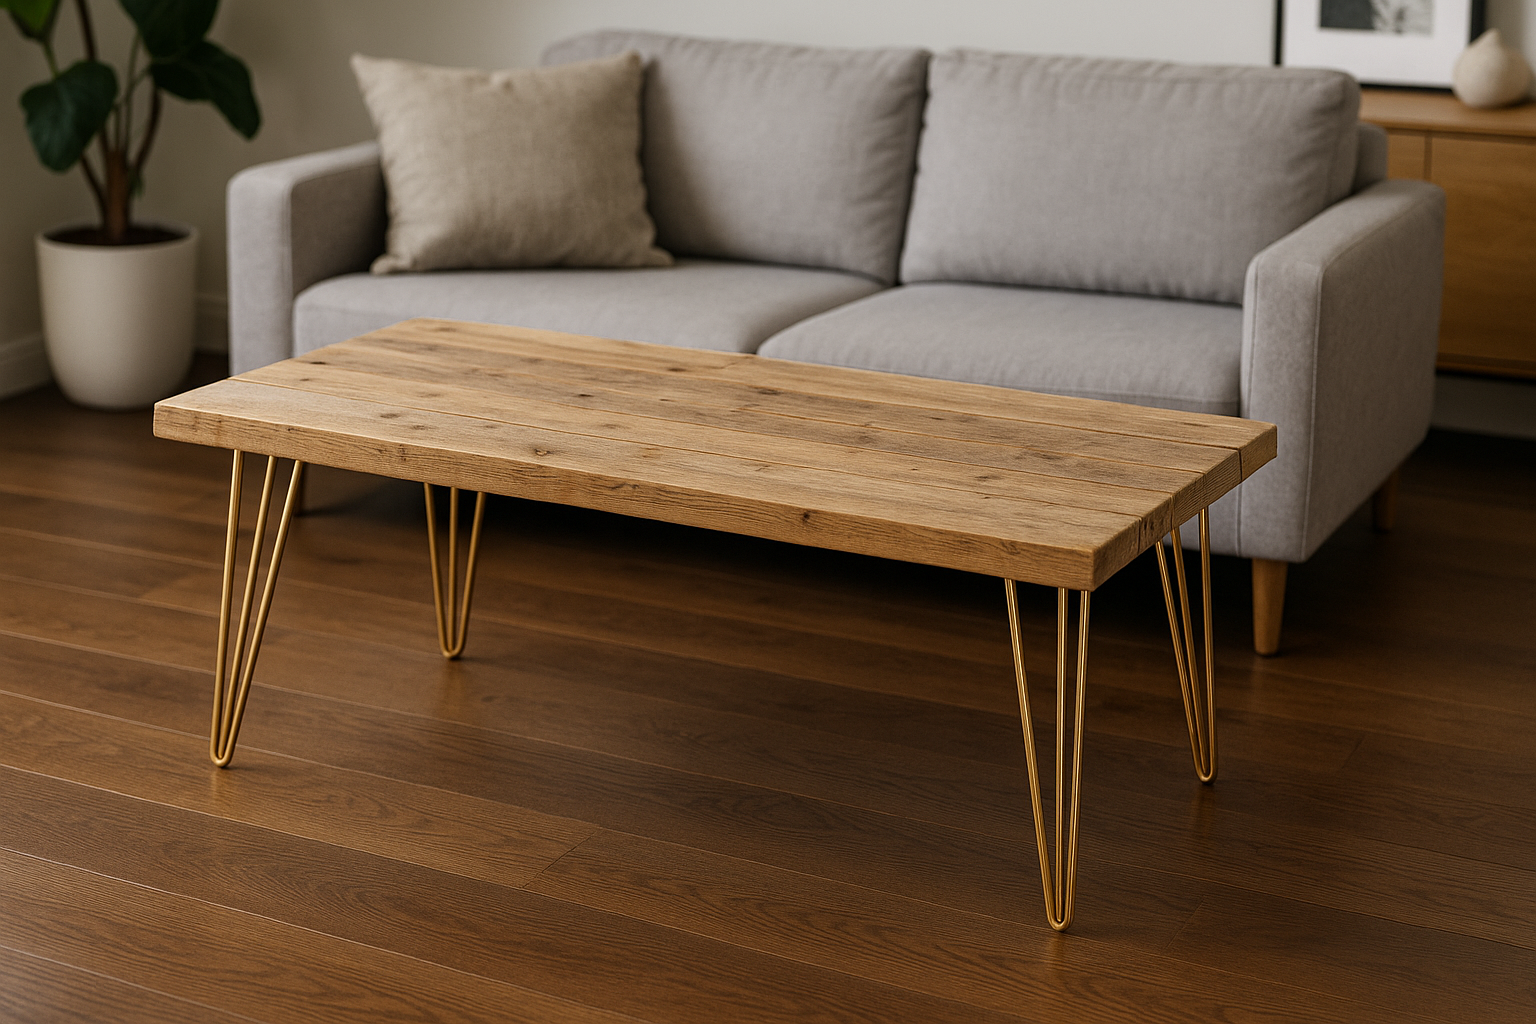
A coffee table made with scaffold boards and hairpin legs has a distinctive look. The boards bring rugged authenticity, often with visible grain, knots, and signs of their previous life. The slim steel legs balance this heaviness, lifting the design so it feels light rather than clunky. The result is a table that looks just as good in a modern loft apartment as it does in a cosy, eclectic living room.
This combination is particularly well-suited to industrial interiors, where raw materials and honest construction are celebrated. It also works beautifully in rustic and farmhouse-style homes, where warmth and charm are key. Even in more minimalist or contemporary spaces, the mix of wood and steel creates a stylish, functional centrepiece.
What Hairpin Legs Are and How They Work
Hairpin legs are a design classic. Made from bent steel rod welded to a mounting plate, they first appeared in the 1940s as a sleek, economical alternative to heavy wooden legs. Today they remain popular because they are strong, versatile, and timeless.
For a coffee table, hairpin legs are ideal. They are slim enough to keep the table from feeling bulky, but strong enough to support even a chunky scaffold board top. Available in two-rod or three-rod designs, they can be chosen to suit the scale of the table and the weight of the boards.
Why Scaffold Boards and Hairpin Legs Work Well Together
Scaffold boards are inherently chunky. Standard boards are about 225mm wide and 38mm thick, giving them heft and substance. On their own, they can feel heavy, even a little clumsy. Hairpin legs, by contrast, are light and refined. When combined, the result is a coffee table that feels grounded but not overpowering, rustic yet modern.
The character of reclaimed timber is softened by the elegance of steel, while the slim legs ensure the table doesn’t dominate the room. It’s a classic case of opposites working together to create balance.
Choosing the Right Colour for the Legs
Hairpin legs are typically sold in black, white, or raw steel finishes. Black creates a strong contrast with the lighter tones of scaffold boards, making the table feel bold and modern. White offers a softer, fresher look that suits Scandinavian-style interiors. Raw steel emphasises the industrial feel but must be sealed to prevent rust.
If you want something unique, you can paint the legs yourself. Lightly sand them to help the paint adhere, then apply spray paint or brush paint in the colour of your choice, finishing with a clear coat. This makes it easy to coordinate the table with your décor, whether that’s matching a colour scheme or adding a pop of contrast.
Why Scaffold Boards Are a Popular Choice
Scaffold boards have become a staple for DIY furniture projects. They are affordable, readily available, and strong enough for tables. Their generous thickness makes them sturdy, while their rustic grain gives them character. Reclaimed boards, in particular, are sought after for the story they carry — nail holes, paint marks, and weathering all add to their charm.
Even new boards have a raw authenticity that makes them appealing. They’re also straightforward to work with: cut them to length, join them together, and you have a chunky, characterful table top.
Cutting the Boards to Size
Scaffold boards usually come in lengths up to 3.9m, so cutting them down is essential for coffee tables. A circular saw can do the job, though a track saw or mitre saw gives more accurate results. Always clamp the boards securely before cutting, measure carefully, and work slowly for clean cuts. Because scaffold boards are thick and heavy, use goggles, hearing protection, and a dust mask, and ideally work with dust extraction.
If you’d prefer to skip the cutting, some suppliers sell pre-cut scaffold board tops. This option costs more but saves mess, time, and effort while ensuring square edges.
Joining the Boards Together
To create a coffee table top, two or three scaffold boards are usually joined side by side. The strongest method is to glue the edges and clamp them until dry. Adding dowels or biscuits helps align the boards and increase strength, though it requires more tools.
If you don’t want to glue, you can fix battens across the underside to hold the boards together. This is quicker and simpler, though it often leaves small gaps between the boards, which may not be ideal if you want a perfectly smooth surface.
Reinforcing Against Movement
Like all solid timber, scaffold boards move with changes in humidity. Over time, this can lead to cupping or slight warping. To reduce this, add battens or bars across the underside, fixed perpendicular to the grain. Wooden battens are inexpensive and easy to attach with screws. Steel bars routed into the underside provide more strength but require more tools and expense.
Coffee tables are shorter than dining tables, so sagging is less of a concern. Still, adding reinforcement helps ensure the surface stays flat over time.
Sanding the Boards
Scaffold boards are usually rough, especially if reclaimed. Sanding is essential to turn them into a usable surface. Start with coarse grit sandpaper to remove dirt, paint, or marks, then move to finer grits for a smooth finish. An electric sander makes this process much quicker, but sanding by hand works too if you enjoy a traditional approach.
The goal isn’t to erase all character but to create a surface that is smooth to the touch and safe for everyday use. Leaving some marks and imperfections adds to the table’s charm.
Pilot Holes and Edge Treatments
When attaching hairpin legs, always drill pilot holes into the underside of the boards first. This prevents the wood from splitting and helps the screws seat properly.
For the edges, you can leave them square for a rugged look, round them slightly with sandpaper for comfort, or use a router to create a chamfer or rounded profile. Even a small amount of shaping can make the table feel more refined and pleasant to use.
Finishing the Table Top
Finishing protects the wood from spills and enhances its natural beauty. Hardwax oil is one of the best options, giving a matte, natural look while offering good resistance to stains. Danish oil and tung oil bring out the warmth of the grain but may need reapplication. For maximum durability, polyurethane varnish provides a tougher surface that resists scratches and stains, though it can create more shine.
Apply several thin coats, sanding lightly between applications. This ensures a smooth, resilient surface that can handle the everyday demands of a coffee table.
Conclusion
A coffee table made with scaffold boards and hairpin legs is a project that combines rustic character with modern style. The chunky, authentic boards bring warmth and history, while the slim legs add elegance and keep the design light. The result is a table that is both practical and eye-catching, able to handle daily use while adding personality to your living room.
With careful cutting, joining, sanding, and finishing, you can create a piece that looks professional yet retains the handmade charm that makes it unique. Affordable, stylish, and full of character, a scaffold board coffee table with hairpin legs is a DIY project that delivers both function and beauty.
