Posted on

Solid Oak vs. Birch Plywood vs. Oak Veneer vs. Scaffold Boards: Choosing the Best Coffee Table Top

A coffee table may not be the largest piece of furniture in your home, but it’s one of the most important. It sits in the centre of the living room, where it inevitably becomes a hub for mugs, snacks, books, laptops, and even the occasional pair of feet. Because coffee tables get so much use, the material you choose for the top matters just as much as the style of legs beneath it. A good top must be durable, attractive, and suited to daily life.

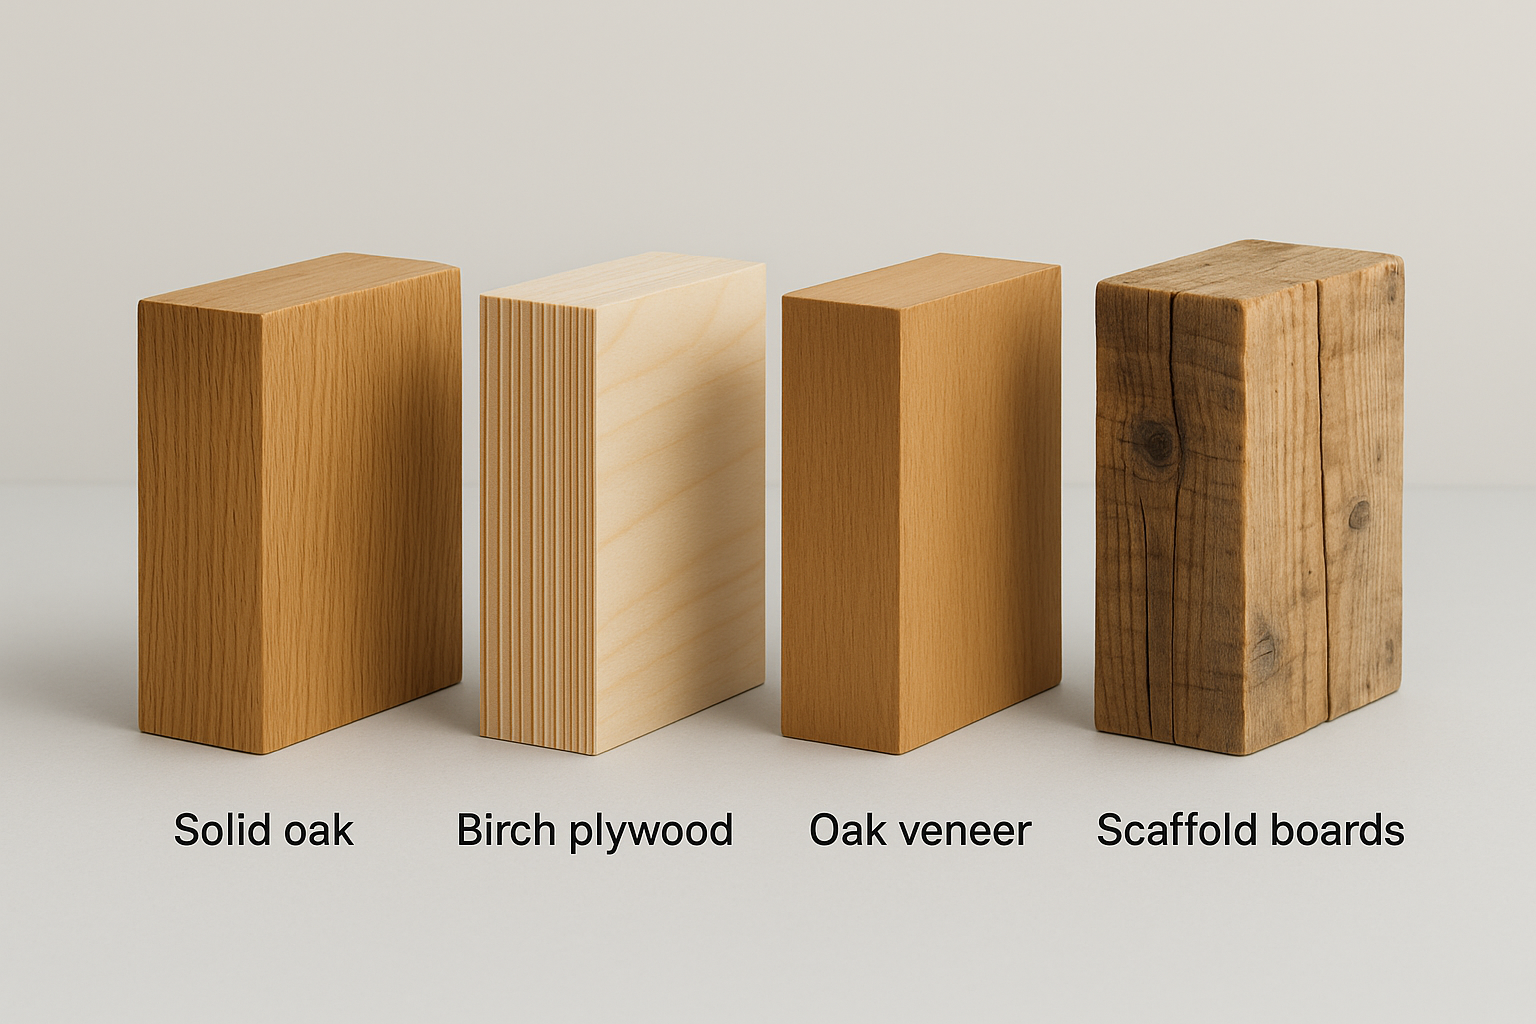
The four most popular choices for DIY coffee tables are birch plywood, solid oak, oak veneer, and scaffold boards. Each brings its own advantages, challenges, and personality. Whether you want modern minimalism, timeless luxury, rustic charm, or a cost-effective solution, one of these options will suit you.

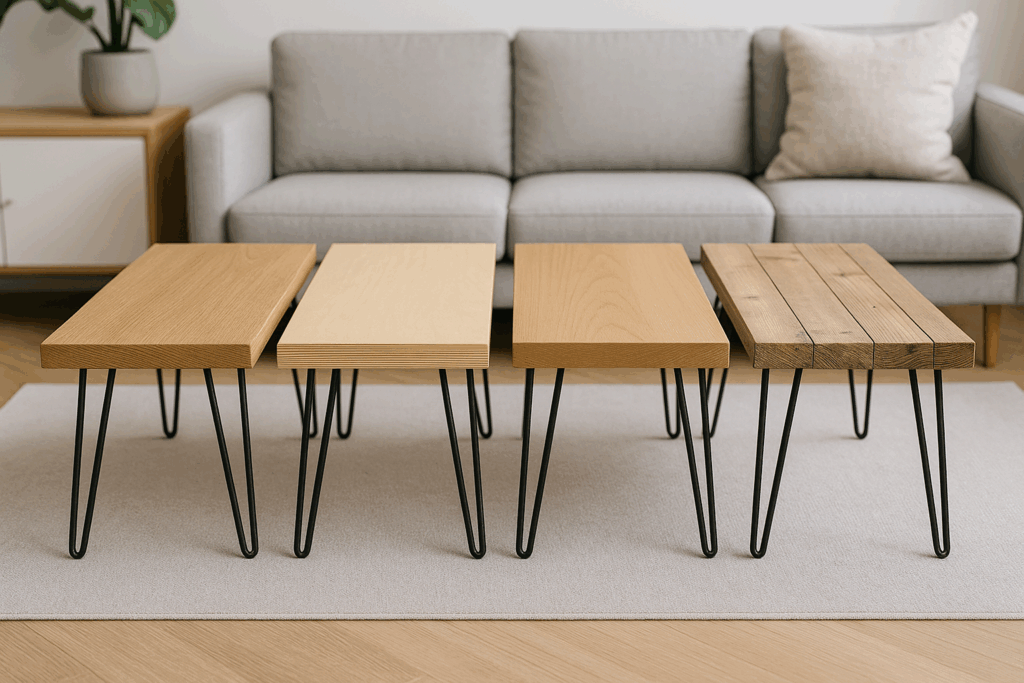
The Style of Each Coffee Table Top

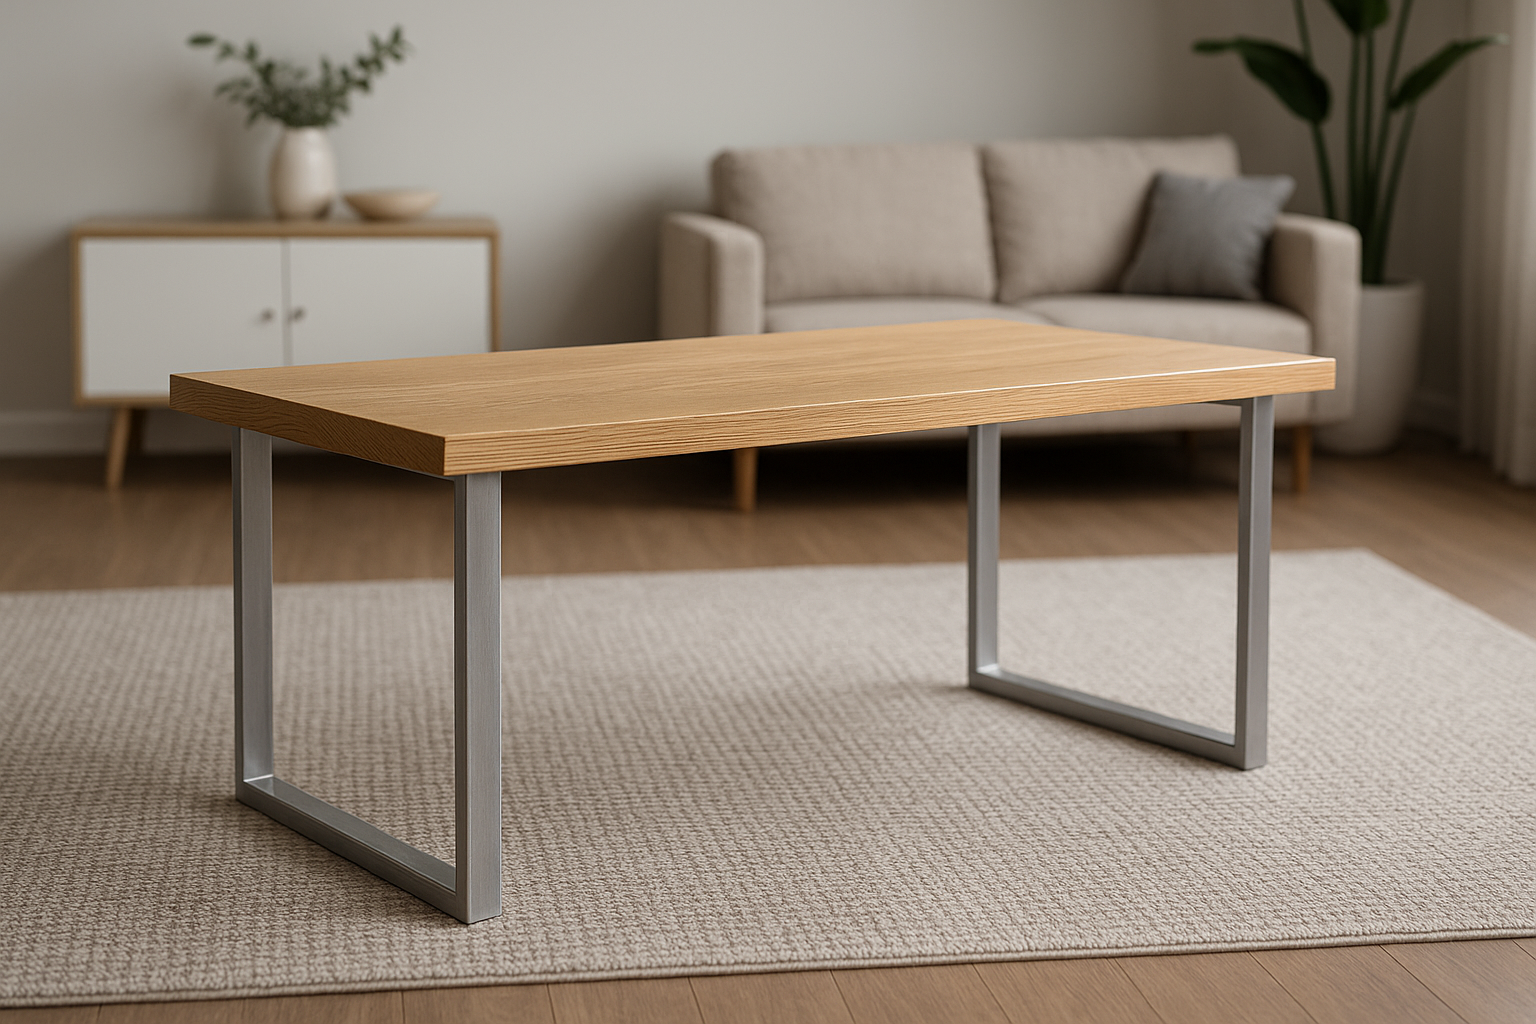
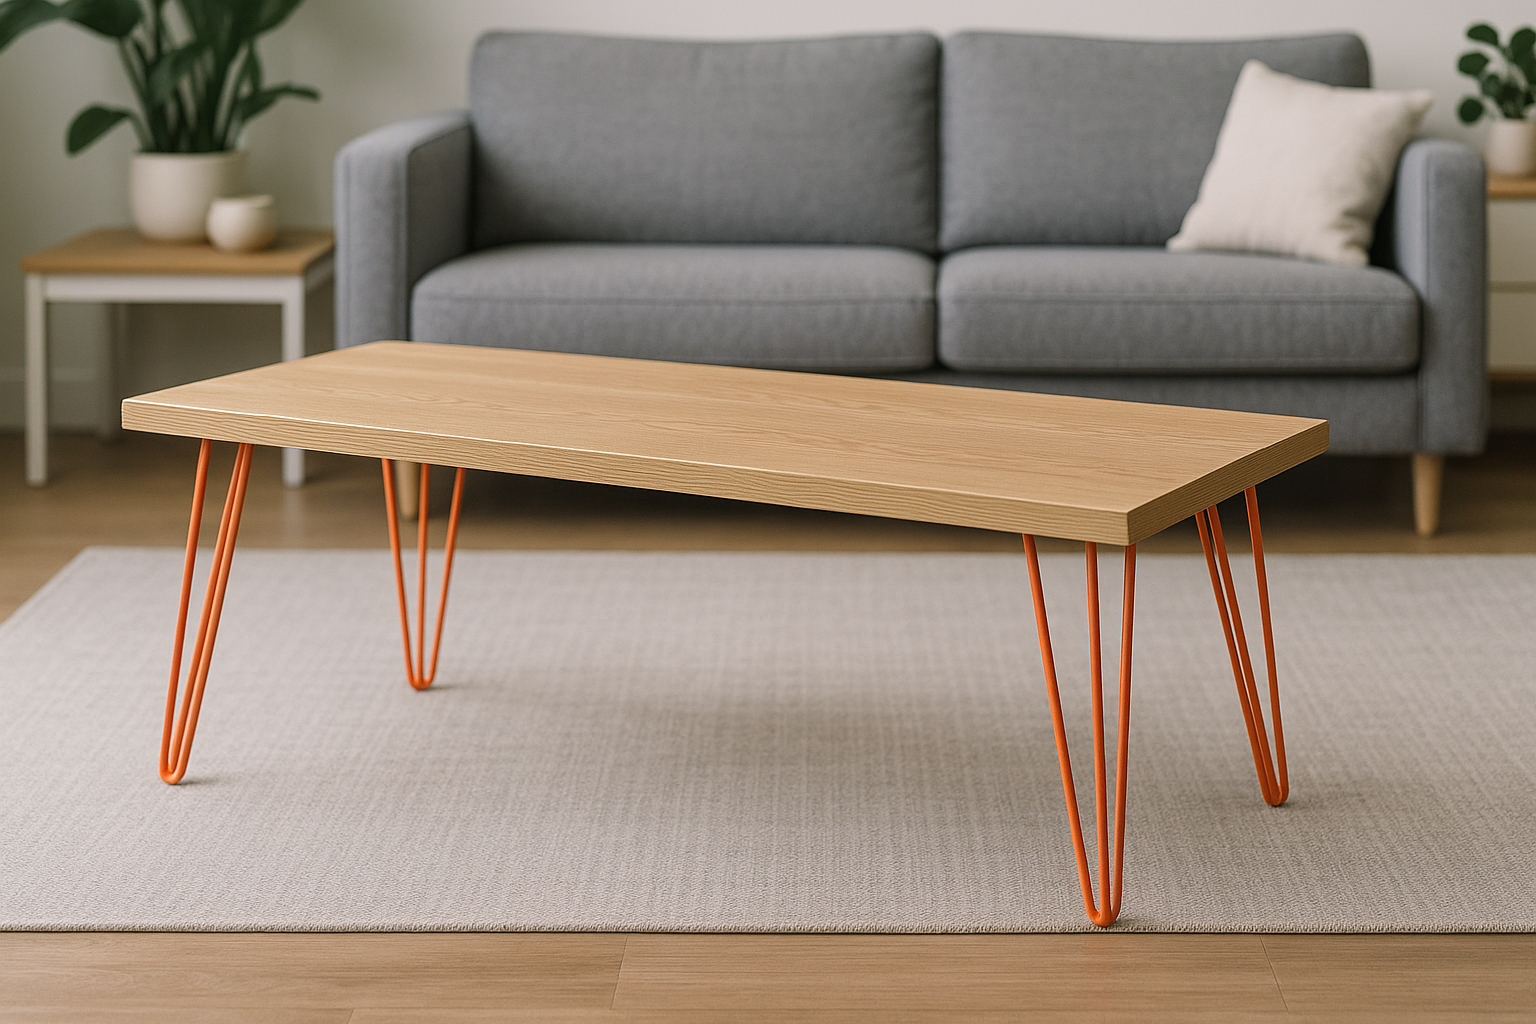
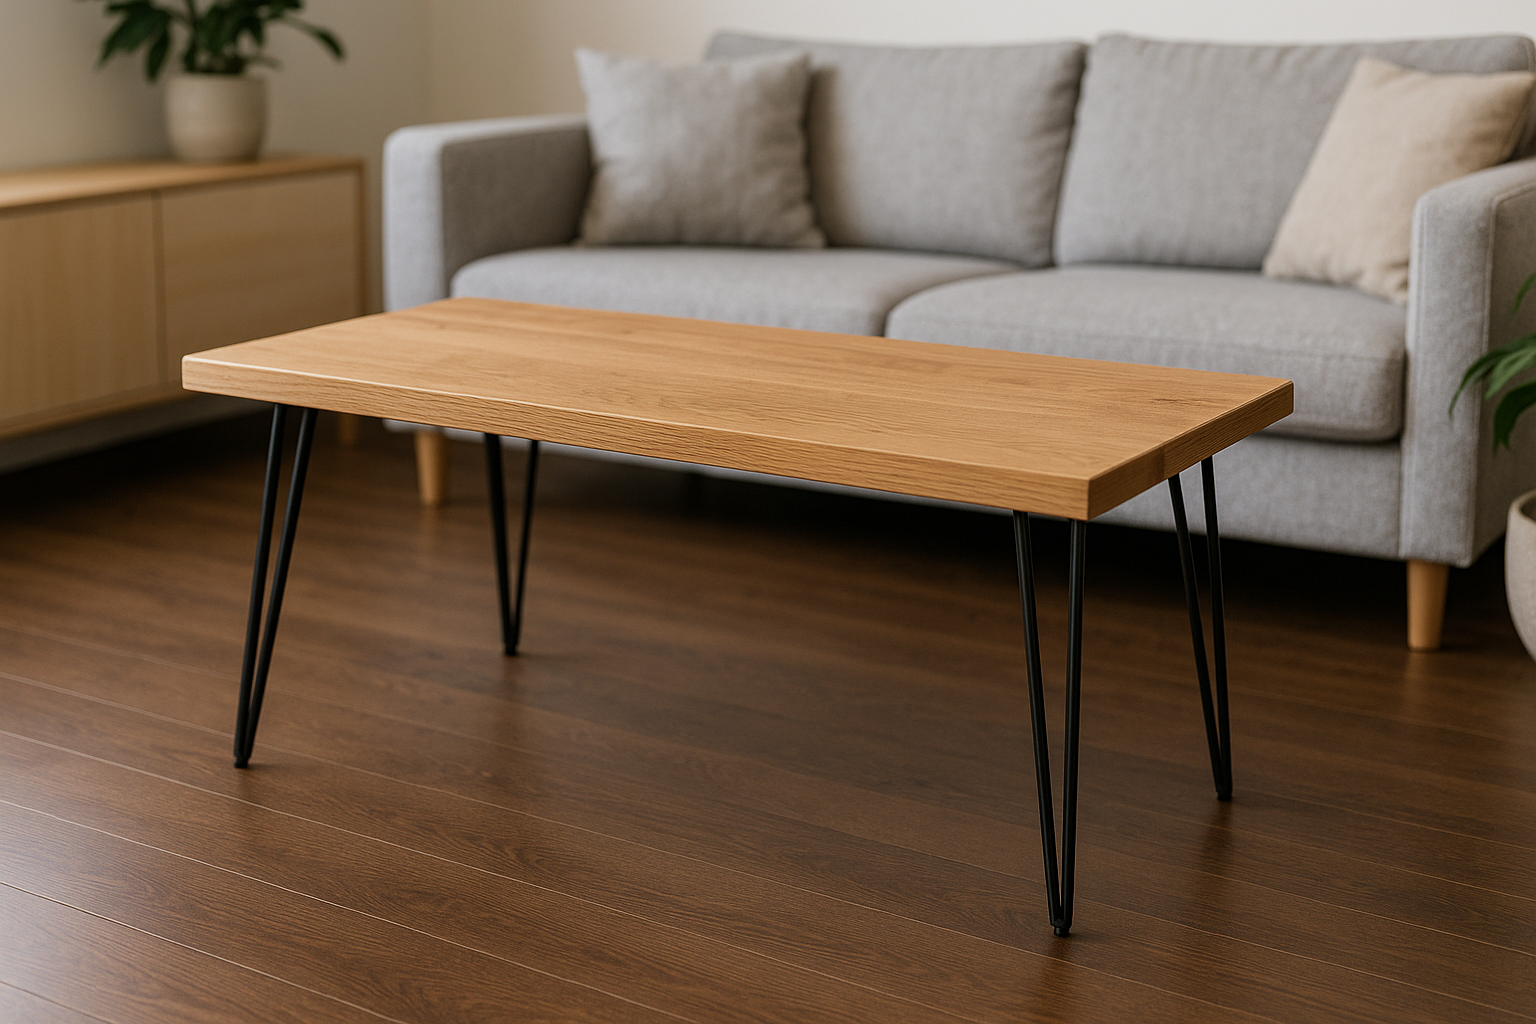
Solid oak offers timeless elegance. With its distinctive grain, natural variation, and rich tone, oak creates a coffee table that feels substantial and enduring. It suits both classic living rooms and modern rustic interiors.

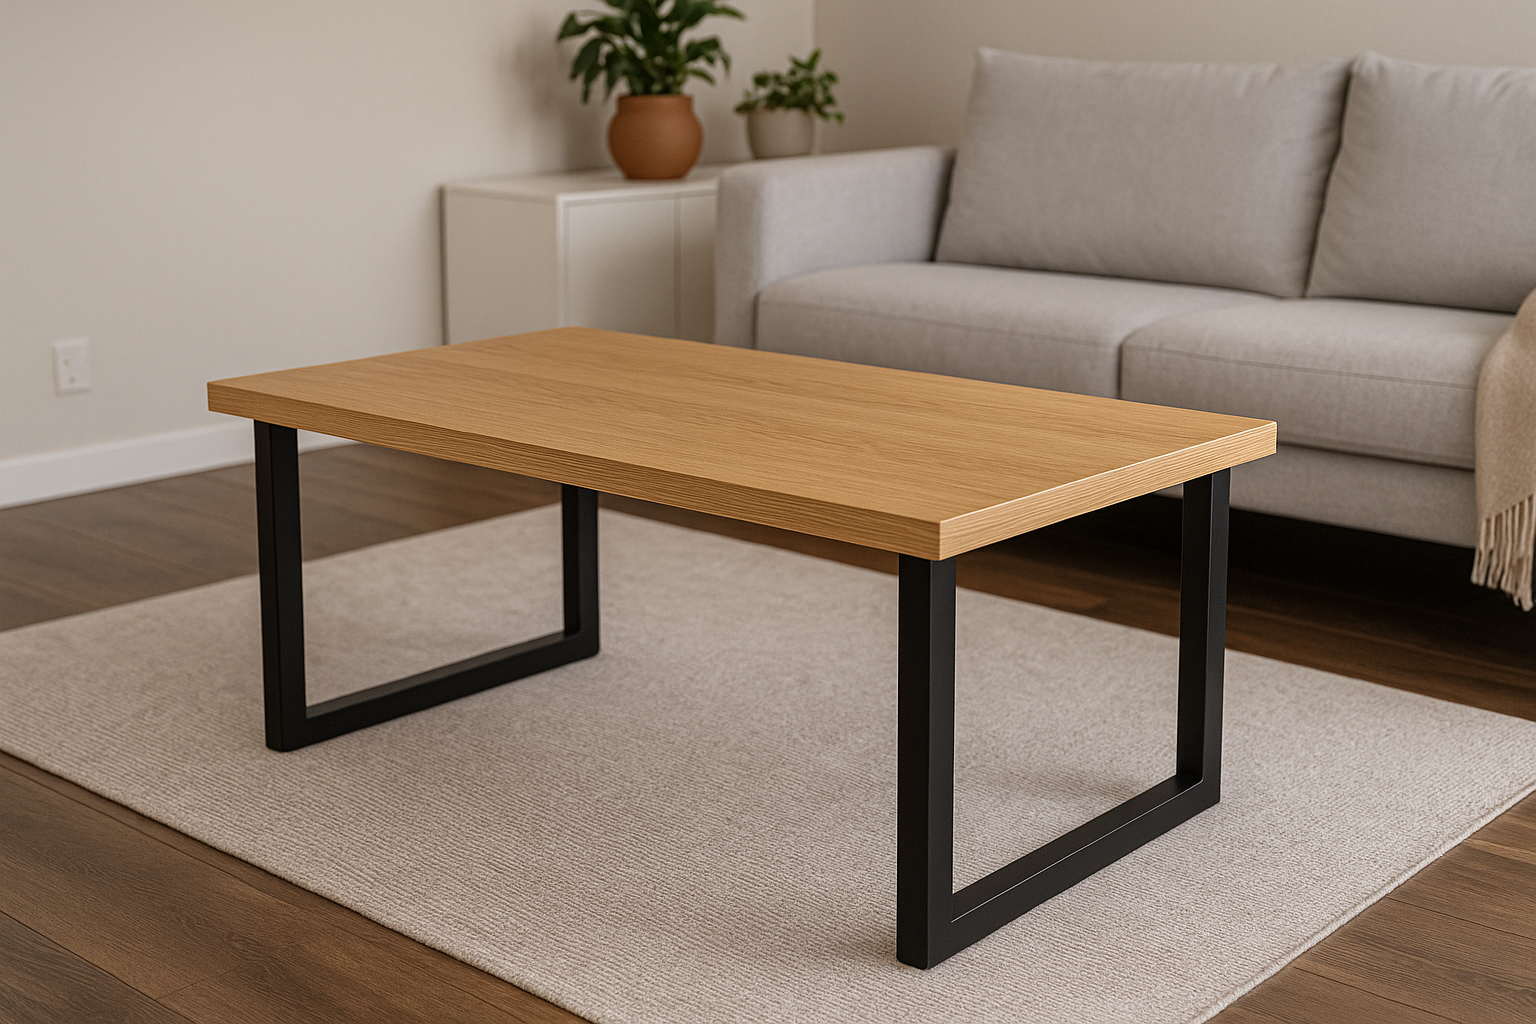
Oak veneer delivers the look of oak in a lighter, more affordable package. Its clean and consistent surface makes it ideal for modern or Scandinavian-inspired rooms. It doesn’t have the depth of solid oak but offers a practical balance of style and budget.

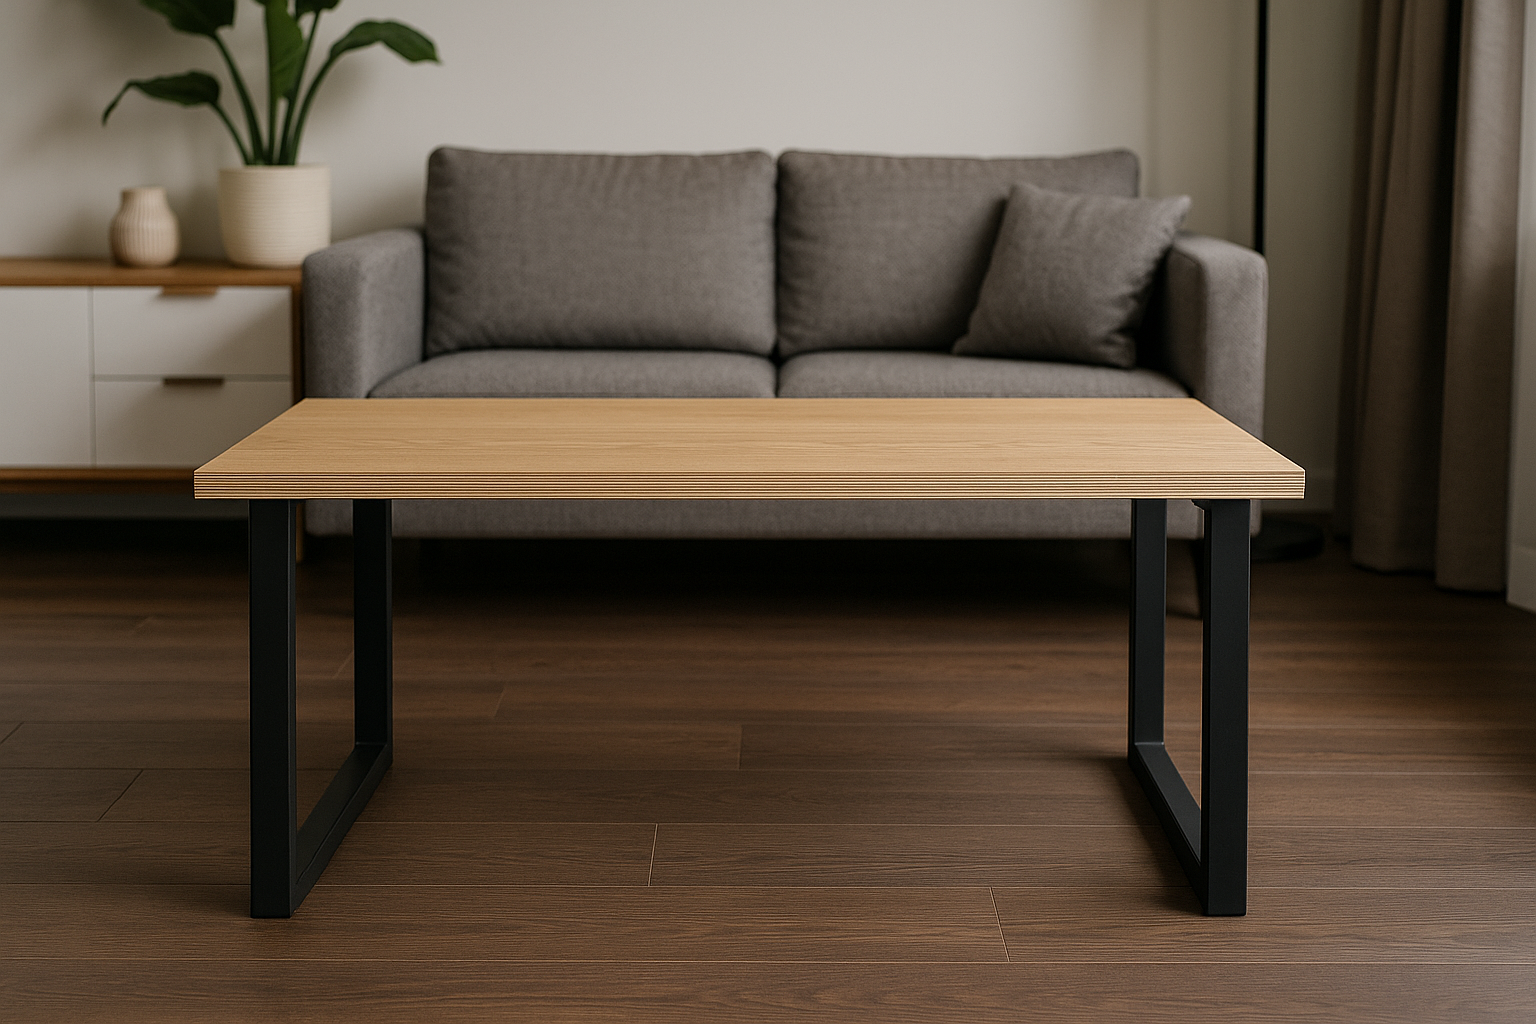
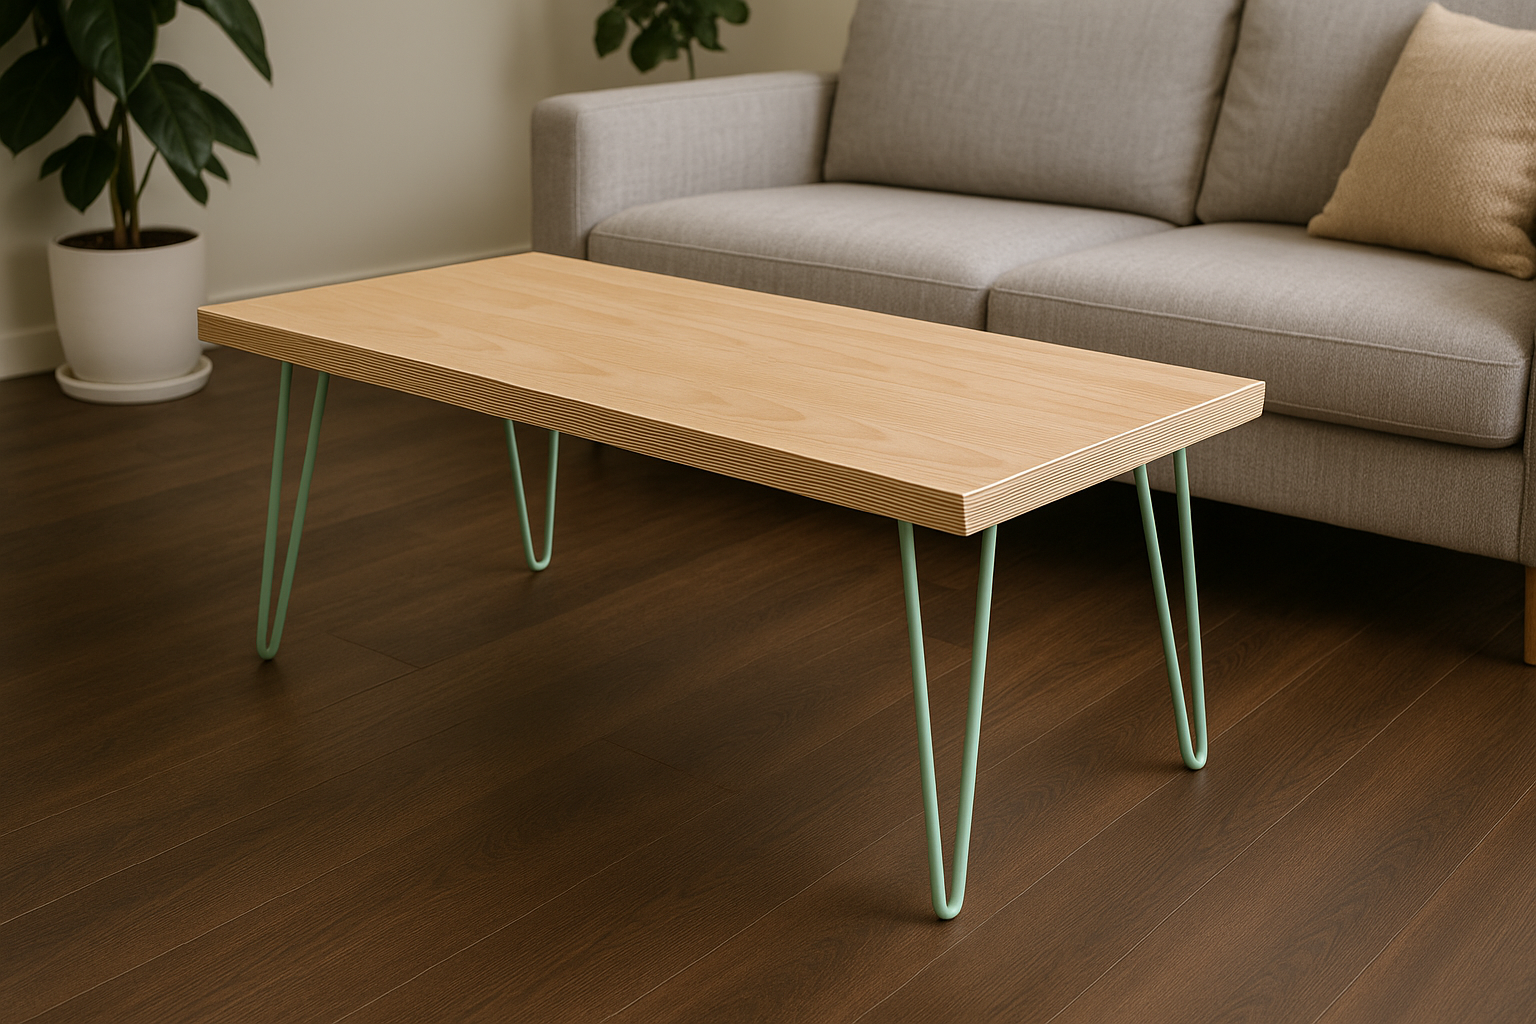
Birch plywood has a fresh, architectural aesthetic. Its pale tone and layered edges are hallmarks of Scandinavian and minimalist design. It feels airy, contemporary, and stylishly understated.

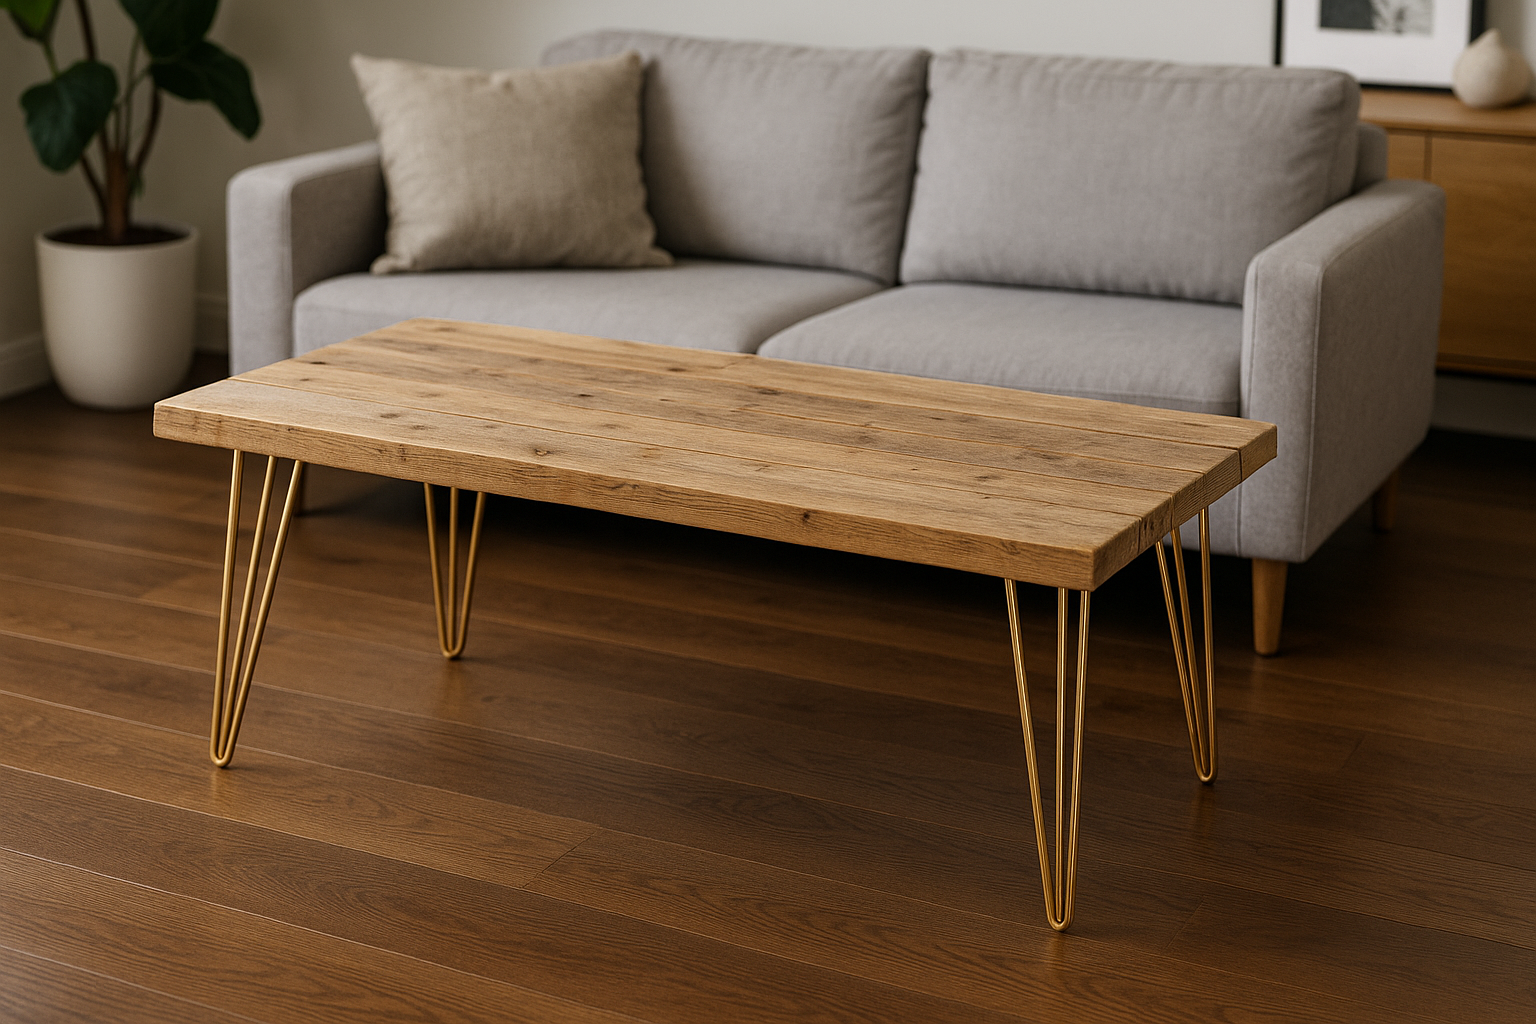
Scaffold boards lean into rustic, industrial charm. With their chunky thickness, visible grain, and reclaimed character, they create coffee tables full of personality. They’re best suited to eclectic, rustic, or industrial interiors where imperfections are celebrated.

Strength, Weight, and Practicality

Solid oak is dense and heavy. It makes for a strong and stable top, capable of withstanding decades of daily use. Its weight can make construction and moving the table more challenging, but the payoff is durability.

Oak veneer is lighter because its core is made from MDF or particleboard. This makes it easy to work with and stable against warping. However, it isn’t as strong or durable as solid wood, and the thin veneer layer can be vulnerable to chips.

Birch plywood strikes a balance between strength and manageability. Its many thin layers of birch veneer make it resistant to warping and strong for its weight. It’s lighter than oak but still sturdy enough for coffee tables.

Scaffold boards are chunky and inherently strong, but as softwood, they dent more easily than hardwoods. They’re also heavy when used in multiples, so moving the table can be a two-person job.

Durability and Daily Use

Coffee tables are exposed to constant wear. Drinks leave water rings, food crumbs spill, and scratches are common.

  • Solid oak is the most forgiving. It can be sanded and refinished many times, meaning it will last decades if cared for.
  • Oak veneer looks beautiful when new, but the thin oak layer cannot be sanded deeply. Scratches and chips are harder to repair, so prevention is key — coasters and placemats are essential.
  • Birch plywood is durable, but its surface veneer is thin. Sanding must be gentle, and a protective finish is crucial to resist scratches and spills.
  • Scaffold boards dent and mark easily, but their rustic style means these imperfections add character rather than detract from the look. They age gracefully in homes where “lived-in” is part of the appeal.

Cost and Availability

Solid oak is the most expensive choice, reflecting its premium quality and longevity. It’s an investment material, especially for larger tables.

Oak veneer is far more affordable and widely available. Veneered panels can also be bought pre-cut to size, which reduces the need for heavy-duty tools.

Birch plywood is mid-range. It’s more costly than softwood plywood but cheaper than solid hardwood. Its availability from timber merchants and online suppliers makes it accessible for most DIY projects.

Scaffold boards are the cheapest option. Reclaimed boards are particularly cost-effective and bring added character. Even new boards are inexpensive compared to oak or birch ply.

Cutting and Preparation

Solid oak requires precise cutting with high-quality tools. Its density makes it harder to work with, but the results are rewarding.

Oak veneer demands delicate handling. Its thin layer chips easily when cut, so a fine-tooth blade, masking tape, or scoring along the cut line helps protect the surface.

Birch plywood cuts cleanly with the right blade, though accuracy is crucial. A track saw is best for straight lines, and dust extraction is recommended due to the fine dust it produces.

Scaffold boards are easier to cut but must usually be joined together to form a top. This involves gluing, dowels, or battens underneath to hold the boards securely.

Sanding and Finishing

  • Solid oak can be sanded aggressively and reshaped if needed. It responds beautifully to oils and varnishes, which enhance its grain while providing protection.
  • Oak veneer must be sanded very gently with fine paper, as the surface is thin. It should be finished with oils or varnishes that don’t require heavy sanding between coats.
  • Birch plywood needs careful sanding to avoid going through the veneer. Hardwax oil or polyurethane varnish works well to highlight its pale tone while protecting it.
  • Scaffold boards often require heavy sanding initially to remove dirt, paint, or splinters, followed by finer sanding for smoothness. Finishes like hardwax oil, Danish oil, or varnish can be used depending on whether you want rustic or refined results.

Which One Should You Choose?

  • Choose solid oak if you want a premium, long-lasting coffee table that can be refinished and repaired for decades.
  • Choose oak veneer if you want the look of oak without the cost or weight, and don’t mind taking extra care with coasters and mats.
  • Choose birch plywood if you prefer a clean, modern aesthetic and want a balance between affordability and durability.
  • Choose scaffold boards if you value rustic character, affordability, and don’t mind dents or imperfections becoming part of the table’s story.

Conclusion

Coffee tables are subjected to constant use, so the top material you choose will define both its style and its lifespan. Solid oak is the most durable and timeless, oak veneer is stylish and budget-friendly but requires more care, birch plywood offers a modern, minimal look at a reasonable cost, and scaffold boards bring rustic authenticity and affordability.

When paired with the right legs — whether bold steel box section frames or slim hairpin legs — each material can be transformed into a coffee table that reflects your taste and lifestyle. The key is to match the material not only to your décor but also to the way you actually live day to day. With the right choice, your DIY coffee table will become more than just a surface — it will be the centrepiece of your living space.

Posted on

How to Make a Coffee Table with Scaffold Boards and Steel Box Section Legs

A coffee table is the workhorse of the living room. It’s where drinks are placed, snacks are shared, books and magazines are stacked, and laptops or games consoles often make an appearance. It’s also a visual anchor, drawing the eye to the centre of the room. Building your own coffee table means you can choose a size, style, and material that reflects your personality and suits your space. One combination that strikes a brilliant balance of rustic character and industrial strength is a scaffold board top paired with steel box section legs.

This design creates a table that is full of charm and history but also grounded and bold. It’s affordable, relatively simple to build, and makes a piece of furniture that feels just as at home in a modern loft as it does in a rustic farmhouse.

The Style of the Coffee Table and Where It Belongs

Scaffold boards have an inherently rugged look. Whether new or reclaimed, they bring visible grain, knots, and character to a project. On their own, they can feel heavy and rough, but when combined with the clean geometry of steel box section legs, the result is balanced and stylish. The steel adds structure and sharp lines, lifting the rustic top into a piece that feels modern and intentional.

This style works beautifully in industrial interiors, where exposed brick, concrete, and steel are celebrated. It also suits eclectic or rustic living rooms, where imperfections and natural textures add charm. Even in more minimalist settings, the combination of wood and steel creates a coffee table that feels practical but design-led.

What Box Section Steel Legs Are and How They Look

Box section legs are made from hollow square or rectangular steel tubing welded into strong frames. They are available in shapes such as rectangles, trapezoids, or custom designs, and their straight lines give them an architectural quality that contrasts beautifully with the irregular character of scaffold boards.

On a coffee table, these legs bring visual weight. Unlike hairpin legs, which are slim and understated, box section legs make a bold statement. They anchor the table and give the rustic top a strong, modern foundation.

Why Scaffold Boards and Steel Work So Well Together

Scaffold boards are chunky, typically 225mm wide and 38mm thick. This makes them naturally sturdy but also visually heavy. Box section steel legs counterbalance that bulk with clean, precise lines. The mix of rustic timber and engineered steel achieves a harmony that feels both rugged and refined.

The steel frames also provide excellent support, ensuring the table top remains strong and stable. It’s a combination that blends the raw charm of reclaimed timber with the durability of modern materials.

Choosing the Right Colour for the Legs

Box section steel legs are usually available in black, white, or raw steel finishes. Black provides a classic, bold contrast with the lighter tones of scaffold boards. White offers a softer, fresher look, which can brighten up the rustic character of the wood. Raw steel leans into the industrial style but should be sealed with a clear coat to prevent rust.

If you want something more bespoke, you can paint the legs. Sand them lightly first for adhesion, then apply spray paint or brush paint in your chosen colour, finishing with a clear protective coat. This gives you flexibility to coordinate the table with your living room décor.

Why Scaffold Boards Are a Popular DIY Choice

Scaffold boards have become a go-to material for DIY makers. They’re affordable, widely available, and incredibly strong. Their thickness makes them sturdy enough for heavy-duty use, while their rustic grain and imperfections give them character.

Reclaimed scaffold boards are especially popular for furniture. They may carry paint marks, nail holes, and weathering that tell the story of their previous life. For some people, this lived-in look is the whole appeal. New boards, by contrast, are cleaner and easier to sand smooth, but still retain a raw authenticity that works well in rustic-modern interiors.

Cutting the Boards to Size

Scaffold boards usually come in long lengths, so cutting them down is essential for coffee tables. A circular saw will handle the job, though a mitre saw or track saw gives more accuracy. Always clamp the boards securely, measure twice, and cut slowly. Scaffold boards are thick and heavy, so goggles, hearing protection, and a dust mask are essential, along with dust extraction if possible.

If you don’t want the hassle of cutting, some suppliers sell pre-cut scaffold board tops. While this option costs more, it saves effort and ensures clean, accurate edges.

Joining the Boards Together

Most coffee table tops are made by joining two or three boards side by side. The most secure method is to glue the edges and clamp them until dry. Adding dowels or biscuits helps keep everything aligned and increases strength.

If you don’t want to glue, battens can be fixed across the underside to hold the boards together. This is quicker and simpler, though it often leaves small gaps between the boards, which may not be ideal if you want a perfectly smooth surface.

Reinforcing Against Movement

Like all solid timber, scaffold boards move with humidity. Over time, this can cause cupping or warping. To reduce this, attach battens or bars underneath, running across the grain. Wooden battens screwed in place are inexpensive and effective. Steel bars routed into the underside provide even more stability but require more tools and expense.

On a coffee table, sagging is less of a concern than on a dining table, but reinforcement still helps keep the surface flat and stable for years to come.

Sanding the Boards

Sanding is an essential step. Reclaimed scaffold boards are often rough, with splinters, paint, or dirt. Even new boards need smoothing before use. Start with a coarse grit to clean and level the surface, then progress to finer grits for a smooth finish. An electric sander makes this much quicker, but hand sanding works too if you prefer a more traditional approach.

The aim is to create a surface that feels pleasant to the touch while retaining some of the wood’s natural character. Marks and imperfections can be left in place to enhance the rustic look if you like.

Pilot Holes and Edge Treatments

When attaching steel box section legs, always drill pilot holes first. This prevents splitting and ensures the screws seat properly.

For the edges, you can leave them square for a rugged look, round them slightly with sandpaper for comfort, or use a router to create a chamfer or rounded profile. Even a small amount of shaping can elevate the table and make it more comfortable to use.

Finishing the Table Top

Finishing is vital to protect the wood and bring out its grain. Hardwax oil is an excellent choice, providing a matte, natural look while guarding against stains. Danish oil or tung oil add warmth and richness but may need periodic reapplication. For maximum durability, polyurethane varnish creates a tough, protective layer that resists scratches and spills, though it adds more shine.

Apply several thin coats, sanding lightly between applications. This ensures a smooth, resilient finish that can handle the daily demands of a living room coffee table.

Conclusion

A coffee table made with scaffold boards and steel box section legs is a project that combines rustic charm with industrial strength. The boards bring warmth, history, and texture, while the steel frames provide structure and boldness. Together, they create a piece that feels substantial, stylish, and perfectly suited to daily life.

By cutting and joining the boards carefully, sanding them smooth, finishing them thoughtfully, and attaching the steel legs securely, you can make a coffee table that looks professional but still carries the handmade character that makes it unique. Affordable, durable, and full of personality, a scaffold board and steel box section coffee table is the perfect DIY centrepiece for a living room where function and style go hand in hand.

Posted on

How to Make a Coffee Table with Birch Plywood and Steel Box Section Legs

A coffee table is one of the most practical and versatile pieces of furniture in the home. It serves as a resting place for mugs and snacks, a display for books and candles, and often doubles as a casual workstation. Because it is central to daily life, its design has to balance style, durability, and function. Making your own coffee table gives you control over all of these elements, allowing you to create something that suits your taste and budget. One of the most modern and achievable options is combining a birch plywood top with steel box section legs.

This pairing has become increasingly popular with DIY furniture makers because it’s both stylish and practical. Birch plywood offers a clean, contemporary surface, while steel box section legs provide boldness and stability. Together, they create a coffee table that feels light, modern, and capable of standing up to everyday use.

The Style of the Coffee Table and Where It Belongs

Birch plywood has a pale, understated grain that feels fresh and contemporary. When left with its layered edges exposed, it takes on a distinctive architectural quality. Box section steel legs, on the other hand, bring structure and presence to the design. Unlike slender hairpin legs, which recede visually, box section legs are strong and geometric, making the table feel more grounded.

This combination works perfectly in Scandinavian-inspired homes, where light woods and minimal lines dominate. It also suits modern apartments and urban lofts, where the steel frames echo architectural features like beams or railings. Even in eclectic or family living rooms, the blend of natural wood and engineered steel creates a table that feels practical yet stylish.

What Box Section Steel Legs Are and How They Look

Box section legs are made from hollow square or rectangular steel tubing. They are welded into frames that can take the form of simple rectangles, trapezoids, or custom angular shapes. Their appeal lies in their strength and their bold lines, which contrast beautifully with the natural softness of wood.

On a coffee table, box section legs add a sense of permanence. They make even a lighter plywood top feel substantial, grounding the design while ensuring the table can easily support daily use.

Why Birch Plywood and Steel Work Well Together

Birch plywood is an engineered material made by laminating thin sheets of birch veneer with alternating grain directions. This construction gives it strength, stability, and resistance to warping. Unlike cheaper softwood plywoods, birch ply has a smooth, consistent surface with no large voids. It’s widely used in furniture-making for its modern look and practical qualities.

When combined with box section steel legs, birch ply finds its perfect match. The plywood keeps the design light and affordable, while the steel adds strength and visual weight. Together, they create a balanced coffee table that feels modern, architectural, and durable.

Choosing the Right Colour for the Legs

Steel legs are typically offered in black, white, or raw steel finishes. Black creates a bold contrast with the pale plywood, giving the table a sharp, modern look. White blends more softly with the light wood, enhancing the Scandinavian character. Raw steel leans into industrial style but must be sealed with a clear coat to prevent rust.

For a bespoke touch, the legs can be painted in any colour. Sand them lightly first for adhesion, then apply spray paint or brush paint, followed by a protective topcoat. This flexibility lets you coordinate the legs with other accents in your living room.

Why Birch Plywood Is Popular for Furniture

Birch plywood has become a favourite for modern DIY makers because it offers a balance of strength, affordability, and style. It is stronger and more attractive than construction-grade plywood, with multiple dense layers of birch veneer that give it a stable, smooth surface. Its exposed layered edge is often treated as a design feature rather than something to hide, making it perfect for clean, contemporary furniture.

Compared to solid hardwood, it’s easier to cut and more affordable, yet still strong enough for everyday use. This makes it particularly well suited to coffee tables, where durability and appearance are both important.

Choosing the Right Thickness

Birch plywood is most commonly available in 18mm and 24mm thicknesses.

  • 18mm works well for smaller coffee tables, giving a sleek, minimal profile.
  • 24mm feels more substantial, resists sagging better, and balances visually with the chunky steel legs.

For most coffee tables, 24mm is the ideal choice. It creates a solid feel while retaining the modern, light appearance that plywood is known for.

The Realities of Using Plywood

Even high-quality birch plywood isn’t flawless. The surface may include small patches or plugs where knots have been removed, and sometimes scratches from handling. These imperfections are part of the character of plywood and usually blend in once sanded and finished.

It’s also important to remember that the top veneer is thin. Sanding must be gentle to avoid going through to the glue layer beneath. While this isn’t a major drawback, it’s a reality to keep in mind when preparing and finishing the surface.

Cutting the Top to Size

Accuracy is essential when cutting plywood. A track saw is the best tool for the job, as it ensures perfectly straight cuts with minimal chipping. A circular saw will work too, especially with a fine-tooth blade and masking tape along the cut line. Always clamp the panel securely, measure carefully, and cut slowly. Plywood produces a lot of fine dust, so wear goggles, a mask, and hearing protection, and use dust extraction if possible.

If you don’t have the right tools, many suppliers offer birch plywood cut to size. This costs slightly more but saves time and ensures perfect dimensions.

Reinforcing the Table Top

Coffee tables are smaller than dining tables, so sagging is less of an issue. However, if your table is longer than 120cm and made with 18mm plywood, you may want to reinforce it with a lengthwise batten or “spine” underneath. This helps the top stay flat under daily use and prevents any long-term bending.

Sanding Birch Plywood

Sanding prepares the plywood for finishing. Start with a medium grit and move to a fine grit such as 240. Always sand lightly with the grain. An orbital sander can be used carefully, but hand sanding is safer for the edges. Many makers choose to leave the layered edge visible as a feature, but you can also soften it with sandpaper for comfort.

Edge Treatments

The layered edge of plywood is one of its defining features. Some people leave it raw for a modern, industrial look, while others choose to cover it with iron-on edge banding for a more uniform appearance. If you want a refined finish, you can use a router to create a chamfer or round-over, or simply ease the edges with hand sanding.

Attaching the Box Section Legs

Box section legs are attached via screws through their mounting plates. Position them 5–8cm in from the corners to give a balanced look and stable support. Always drill pilot holes before driving screws into the plywood to avoid splitting or damaging the veneer layers.

Check the positioning before drilling to ensure the frames don’t interfere with nearby furniture or storage underneath the table.

Finishing the Plywood Top

Finishing not only protects the plywood but also enhances its natural beauty.

  • Hardwax oil gives a natural matte finish while protecting against stains.
  • Danish oil or tung oil warm up the wood but may require periodic reapplication.
  • Polyurethane varnish provides the toughest protection against scratches and water rings, though it can look shinier.

Apply multiple thin coats, sanding lightly between them for a smooth finish. This ensures the table can withstand daily living room use, from mugs and glasses to the occasional spill.

Conclusion

A coffee table made with a birch plywood top and steel box section legs is a modern, practical, and affordable DIY project. The plywood provides a clean, architectural look, while the steel frames add strength and bold geometry. Together, they create a table that is light enough for modern interiors but strong enough to handle everyday wear.

By choosing the right thickness, cutting accurately (or ordering pre-cut), sanding carefully, finishing thoughtfully, and attaching the legs securely, you can create a coffee table that looks professional and feels solid. This design is perfect for contemporary homes, studios, and urban spaces, proving that simple materials can produce stylish, long-lasting furniture when paired with care and creativity.

Posted on

How to Make a Coffee Table with an Oak Veneer Top and Steel Box Section Legs

A coffee table may not be the biggest piece of furniture in your living room, but it’s one of the most important. It’s the place where drinks are set down, books are stacked, and everyday life naturally gathers. Building your own coffee table gives you the freedom to choose a size and style that fits your home perfectly while saving money compared to buying ready-made. A particularly attractive and practical option is pairing an oak veneer top with steel box section legs. The result is a table that feels modern, stylish, and durable enough for daily use without carrying the cost or weight of solid oak.

The Style of the Coffee Table and Where It Belongs

Oak veneer paired with steel legs creates a coffee table with a clean, contemporary character. The oak veneer surface brings natural warmth and grain, while the steel legs add structure and bold geometry. Unlike slimmer hairpin legs, which often fade into the background, box section legs have presence. They anchor the piece visually, giving the table a more architectural feel.

This style is particularly suited to modern apartments, where space is limited but style is a priority. It also works beautifully in Scandinavian-inspired living rooms, where light woods and clean lines dominate. In industrial or urban interiors, the blend of warm wood and raw steel feels right at home. The combination is versatile enough to work in minimalist settings as well as more eclectic ones.

What Box Section Steel Legs Are and How They Look

Box section legs are made from hollow rectangular or square steel tubing. Welded into rigid frames, they are available in a range of shapes, from simple rectangles to trapezoids or custom angular designs. Their straight lines give them strength and a modern, architectural aesthetic that contrasts well with natural timber.

On a coffee table, box section legs bring stability and boldness. They make the piece feel substantial, ensuring that even a slim veneered top has a grounded presence.

Why Oak Veneer and Steel Work Well Together

Oak veneer is an excellent choice for projects where you want the look of oak without the cost, weight, or potential movement of solid wood. It is made by bonding thin slices of oak onto a core material such as MDF or particleboard. This creates a stable, lightweight panel that resists warping and is easy to work with.

When paired with box section steel legs, veneer achieves a refined balance. The boldness of the steel frames grounds the lighter, more affordable surface, creating a coffee table that feels well-proportioned and stylish. It’s a combination that delivers on both practicality and appearance.

Choosing the Right Colour for the Legs

Steel box section legs are commonly available in black, white, or raw steel finishes. Black creates a sharp contrast against the oak veneer, giving the table a modern, graphic edge. White softens the look, enhancing the light, Scandinavian aesthetic. Raw steel leans into the industrial style but should be sealed to prevent rust.

For a bespoke approach, the legs can be painted in any colour. To do this, lightly sand the steel for adhesion, apply spray or brush paint, and finish with a clear coat. This allows you to coordinate the table with your living room palette, whether you prefer subtle blending or bold contrast.

Why Oak Veneer Differs from Solid Oak

Unlike solid oak, which is hardwood all the way through, oak veneer has only a thin layer of oak on the surface. The benefit is that veneered panels are far lighter, more affordable, and more stable — they don’t expand or contract with changes in humidity the way solid wood does.

The trade-off is durability. The veneer layer is thin, usually less than a millimetre thick, which means it can’t be sanded and refinished multiple times. Once damaged, chips or deep scratches are difficult to repair. For a coffee table, which sees daily use, this means extra care is needed: coasters, placemats, and quick cleanup of spills are essential.

Everyday Durability and Maintenance

Coffee tables are often treated casually. Mugs, glasses, and even feet end up on them, so the surface must be protected. Oak veneer will stay beautiful for many years if looked after carefully. Using coasters prevents water rings, trays protect against scratches, and spills should be wiped up promptly. Unlike solid oak, you can’t refinish veneer once it’s worn through, so prevention is key.

The advantage is that veneer is resistant to warping or cracking, so the top will stay flat and stable no matter the season. This makes it a smart option for busy households that want practicality without the upkeep of solid wood.

Choosing the Right Thickness

Oak veneered panels are available in 18mm, 22mm, and 25mm thicknesses. For a coffee table, 22mm or 25mm is the sweet spot, providing a balance of strength and appearance. An 18mm panel works for smaller tables but may look insubstantial when paired with chunky steel legs. A thicker top balances the weight of the frames, ensuring the design feels proportional.

Cutting and Preparing Veneer

If you’re cutting the panel yourself, use a fine-tooth saw blade and take precautions against chipping. Masking tape along the cut line, cutting slowly, and using a track saw are the best ways to achieve a clean finish. A circular saw will do the job if that’s what you have, but the accuracy of a track saw makes a noticeable difference.

For those without access to good tools, ordering veneered panels pre-cut to size from an online supplier is worth considering. It costs a little more per square metre but guarantees straight, accurate cuts and eliminates the hassle of handling large sheets.

Sanding Veneer Safely

Sanding veneer requires care. The oak surface layer is thin, so aggressive sanding can quickly go through to the core material. Start with a fine grit such as 180, sanding lightly with the grain, and avoid power sanding unless you are confident. Edges should be sanded gently by hand for the best results.

Edge Treatments

The edges of veneered panels usually expose the MDF or particleboard core. These can be covered with iron-on oak edge banding, which creates the look of a solid oak top. For a more premium finish, solid oak lippings can be glued to the edges, then sanded flush. If you prefer a minimalist approach, you can simply ease the edges with fine sandpaper for comfort, though the exposed core will remain visible.

Attaching the Box Section Legs

Box section legs are fixed to the underside of the top using screws through their mounting plates. Position the legs 5–8cm in from the edges to ensure stability and a balanced appearance. Always drill pilot holes before inserting screws, as this prevents splitting and ensures a secure fit.

Check the placement before drilling to ensure the frames don’t clash with skirting boards if the table will sit against a wall. Also consider the space between the legs for storing baskets or ottomans underneath.

Finishing the Veneer Surface

Finishing protects the veneer and enhances the oak grain. For coffee tables, where spills and scratches are inevitable, a durable finish is essential.

  • Hardwax oil provides a natural matte look while offering good resistance to stains.
  • Danish oil or tung oil bring warmth and depth, though they may require reapplication.
  • Polyurethane varnish creates the toughest barrier, protecting against scratches and water rings, though it may add more shine.

Apply multiple thin coats, sanding lightly between applications. Because veneer is thin, avoid heavy sanding between coats — a light touch is enough to smooth the finish.

Conclusion

A coffee table with an oak veneer top and steel box section legs combines style, affordability, and practicality. The veneer gives you the natural beauty of oak grain without the cost or weight of solid wood, while the steel legs add bold geometry and stability. Together they create a table that looks professional, feels substantial, and suits a wide range of interiors.

By choosing the right thickness, cutting carefully (or ordering pre-cut), sanding gently, finishing thoughtfully, and attaching the legs with precision, you can create a coffee table that rivals designer pieces while staying within budget.

This combination is perfect for modern living rooms, Scandinavian-inspired spaces, or industrial lofts. While veneer requires a little extra care compared to solid oak, it offers a smart balance of cost and style — proof that with thoughtful choices, you can make a coffee table that looks elegant, functions beautifully, and reflects your personal taste.

Posted on

How to Make a Coffee Table with a Solid Oak Top and Steel Box Section Legs

A coffee table is more than just somewhere to put your mug down — it’s a centrepiece of the living room, a hub for books, snacks, remote controls, and often the first piece of furniture guests notice when they walk in. Building one yourself allows you to create something sturdy, beautiful, and tailored to your space. Among the most stylish and durable designs is a solid oak top paired with steel box section legs. This combination marries the timeless appeal of hardwood with the clean, geometric strength of steel, producing a coffee table that looks contemporary but feels built to last.

The Style of the Coffee Table and Where It Belongs

Oak paired with steel is a design combination that balances natural warmth with industrial edge. A solid oak top brings grain, depth, and richness, while box section steel legs give the table structure and sharp lines. Together, they create a coffee table that feels modern yet timeless.

This design is particularly at home in urban lofts, where exposed brick and steel details suit the industrial look. It also works in Scandinavian-inspired homes, where oak’s warmth offsets the minimalism of steel. In modern family living rooms, it provides both strength and style — able to withstand daily use while still looking refined. Whether your décor leans rustic, industrial, or contemporary, this table fits in seamlessly.

What Box Section Steel Legs Are and How They Look

Box section legs are made from hollow steel tubing, either square or rectangular, welded into rigid frames. Their sharp geometry contrasts beautifully with the organic softness of wood grain. They’re often available in trapezoid, rectangular, or even custom shapes, giving you flexibility in the look of the table.

On a coffee table, box section legs make a bold statement. Unlike slim hairpin legs, which tend to disappear into the background, box section legs have visual weight. They anchor the table firmly to the floor, making it feel substantial and professional.

Why Solid Oak and Steel Work Well Together

Oak is one of the most prized hardwoods in furniture making. It’s dense, strong, and visually striking, with a grain pattern that ranges from straight and subtle to dramatic with medullary rays. On its own, however, oak can look heavy. Pairing it with steel box section legs balances that weight, giving the table both strength and lightness.

The steel frames provide excellent support, ensuring the heavy oak top won’t sag or warp. Visually, the mix of materials blends tradition with modernity — the warmth of wood against the cool precision of steel. It’s a look that’s equally at home in a rustic farmhouse or a modern penthouse.

Choosing the Right Colour for the Legs

Steel legs are most commonly available in black, white, or raw steel. Black is the classic choice, contrasting beautifully with oak and giving the table a bold, modern look. White feels softer and fresher, making the table lighter in appearance — ideal for Scandinavian-style living rooms. Raw steel highlights the industrial character but needs sealing with a clear coat to prevent rust.

If you want a bespoke look, painting is an option. Sand the legs lightly to help the paint adhere, then spray or brush them with your chosen colour, finishing with a protective clear coat. This allows you to tie the table into your existing décor — for example, matching the frame colour to your shelving or light fittings.

Why Solid Oak Stands Out Compared to Cheaper Alternatives

Unlike oak veneer or laminate, solid oak is consistent through its thickness. It can be sanded and refinished multiple times over decades of use. This makes it an excellent choice for coffee tables, which endure constant wear from hot mugs, water rings, and scratches. While veneer may show damage that can’t be repaired, solid oak can be restored time and again, giving it a lifespan measured in decades rather than years.

Solid oak also has a depth of grain and natural variation that imitations cannot match. Every table top is unique, carrying its own character in knots, rays, and colour shifts.

Choosing the Thickness of Oak

For a coffee table, the thickness of the top makes a big difference in both look and feel. Common sizes from timber suppliers include 19mm, 24mm, 27mm, 30mm, and even 40mm.

  • 19mm gives a sleek, modern profile but can feel a little light for larger tables.
  • 24mm or 27mm is a good middle ground, offering strength, substance, and balance with the steel legs.
  • 30mm or 40mm creates a chunky, bold look but adds considerable weight.

For most coffee tables, 24mm or 27mm is ideal — thick enough to feel substantial, but not so heavy that the table becomes difficult to move.

The Realities of Using Natural Oak

Oak is a natural material, and part of its charm lies in its imperfections. Knots, colour variations, and medullary rays are common features. Some suppliers offer prime oak, which has fewer knots and a more uniform appearance, while character oak embraces natural features for a more rustic look.

Because oak responds to changes in humidity, it may expand or contract slightly over the seasons. On a coffee table, this is less dramatic than on larger dining tables, but it’s still worth considering. Reinforcing the underside with battens or bars helps keep the top flat and stable.

Cutting the Oak Top to Size

If you’re cutting your oak yourself, accuracy and safety are key. A track saw provides the most precise results, though a good-quality circular saw can also work with a fine-tooth blade. Always measure carefully, mark your cuts clearly, and clamp the timber securely. Oak is dense and heavy, so work slowly and use dust extraction if possible.

For many DIY makers, it’s easier to buy the oak pre-cut to size from an online supplier. This reduces waste, eliminates the need for specialist tools, and guarantees square, accurate cuts.

Sanding and Preparing the Oak

Before finishing, oak needs sanding to create a smooth surface. Start with medium-grit paper to even out the surface, then progress to finer grits for a polished feel. Always sand with the grain to avoid scratches. An electric sander speeds up the process, but hand sanding works well on edges and corners.

At this stage, you may also want to ease the edges for comfort. A simple round-over with sandpaper softens the corners, or you can use a router to create a chamfered or profiled edge. Even subtle shaping makes the table feel more refined.

Attaching the Box Section Legs

Box section legs are usually fixed by screwing through their mounting plates into the underside of the top. Before attaching, decide on placement: legs are generally inset by 5–8cm from the edges for stability and balance. Drill pilot holes first to prevent splitting the wood, then fix the screws securely. Because oak is dense, using a drill with sufficient power makes the job much easier.

If the table will sit against a wall, check that the frames don’t clash with skirting boards. It’s also worth testing the leg position with your seating to make sure the frames don’t obstruct foot space.

Finishing the Oak Top

A finish protects the wood and enhances its natural grain. For a coffee table, durability is essential — hot drinks, water spills, and scratches are inevitable.

  • Hardwax oil is an excellent choice, offering a natural matte look while providing good resistance to stains.
  • Danish oil or tung oil bring warmth and depth but may require periodic reapplication.
  • Polyurethane varnish creates the toughest barrier, making the surface resistant to scratches and stains, though it adds more shine.

Apply several thin coats, sanding lightly between applications for a smooth, resilient finish. The result is a surface that looks beautiful while withstanding the daily wear of living room life.

Conclusion

A coffee table with a solid oak top and steel box section legs is a project that combines timeless materials with modern design. The oak top provides warmth, character, and durability, while the steel legs add structure and bold geometry. Together, they create a coffee table that feels substantial, stylish, and ready to handle daily use.

By choosing the right thickness of oak, cutting or ordering pre-cut panels, sanding carefully, finishing thoughtfully, and attaching the legs with precision, you can build a piece that looks as good as a designer table but carries the satisfaction of being handmade.

This combination suits a wide range of interiors, from industrial lofts to modern family living rooms, and with the right finish it will last for decades. A coffee table built from solid oak and steel isn’t just furniture — it’s a centrepiece you’ll use and appreciate every day.

Posted on

How to Make a Coffee Table with Scaffold Boards and Hairpin Legs

A coffee table is the kind of furniture that gets used without a second thought. It’s where cups of coffee are set down, snacks are served, laptops perch for late-night work, and sometimes it even doubles as a footrest. Because it takes on so many roles, a coffee table needs to be sturdy, practical, and inviting. Building your own gives you the freedom to decide how it looks and how it fits into your home. One of the most rewarding DIY projects is pairing scaffold boards with hairpin legs. The result is a table that feels rustic yet modern, substantial yet light, and full of character.

The Style of the Coffee Table and Where It Belongs

A coffee table made with scaffold boards and hairpin legs has a distinctive look. The boards bring rugged authenticity, often with visible grain, knots, and signs of their previous life. The slim steel legs balance this heaviness, lifting the design so it feels light rather than clunky. The result is a table that looks just as good in a modern loft apartment as it does in a cosy, eclectic living room.

This combination is particularly well-suited to industrial interiors, where raw materials and honest construction are celebrated. It also works beautifully in rustic and farmhouse-style homes, where warmth and charm are key. Even in more minimalist or contemporary spaces, the mix of wood and steel creates a stylish, functional centrepiece.

What Hairpin Legs Are and How They Work

Hairpin legs are a design classic. Made from bent steel rod welded to a mounting plate, they first appeared in the 1940s as a sleek, economical alternative to heavy wooden legs. Today they remain popular because they are strong, versatile, and timeless.

For a coffee table, hairpin legs are ideal. They are slim enough to keep the table from feeling bulky, but strong enough to support even a chunky scaffold board top. Available in two-rod or three-rod designs, they can be chosen to suit the scale of the table and the weight of the boards.

Why Scaffold Boards and Hairpin Legs Work Well Together

Scaffold boards are inherently chunky. Standard boards are about 225mm wide and 38mm thick, giving them heft and substance. On their own, they can feel heavy, even a little clumsy. Hairpin legs, by contrast, are light and refined. When combined, the result is a coffee table that feels grounded but not overpowering, rustic yet modern.

The character of reclaimed timber is softened by the elegance of steel, while the slim legs ensure the table doesn’t dominate the room. It’s a classic case of opposites working together to create balance.

Choosing the Right Colour for the Legs

Hairpin legs are typically sold in black, white, or raw steel finishes. Black creates a strong contrast with the lighter tones of scaffold boards, making the table feel bold and modern. White offers a softer, fresher look that suits Scandinavian-style interiors. Raw steel emphasises the industrial feel but must be sealed to prevent rust.

If you want something unique, you can paint the legs yourself. Lightly sand them to help the paint adhere, then apply spray paint or brush paint in the colour of your choice, finishing with a clear coat. This makes it easy to coordinate the table with your décor, whether that’s matching a colour scheme or adding a pop of contrast.

Why Scaffold Boards Are a Popular Choice

Scaffold boards have become a staple for DIY furniture projects. They are affordable, readily available, and strong enough for tables. Their generous thickness makes them sturdy, while their rustic grain gives them character. Reclaimed boards, in particular, are sought after for the story they carry — nail holes, paint marks, and weathering all add to their charm.

Even new boards have a raw authenticity that makes them appealing. They’re also straightforward to work with: cut them to length, join them together, and you have a chunky, characterful table top.

Cutting the Boards to Size

Scaffold boards usually come in lengths up to 3.9m, so cutting them down is essential for coffee tables. A circular saw can do the job, though a track saw or mitre saw gives more accurate results. Always clamp the boards securely before cutting, measure carefully, and work slowly for clean cuts. Because scaffold boards are thick and heavy, use goggles, hearing protection, and a dust mask, and ideally work with dust extraction.

If you’d prefer to skip the cutting, some suppliers sell pre-cut scaffold board tops. This option costs more but saves mess, time, and effort while ensuring square edges.

Joining the Boards Together

To create a coffee table top, two or three scaffold boards are usually joined side by side. The strongest method is to glue the edges and clamp them until dry. Adding dowels or biscuits helps align the boards and increase strength, though it requires more tools.

If you don’t want to glue, you can fix battens across the underside to hold the boards together. This is quicker and simpler, though it often leaves small gaps between the boards, which may not be ideal if you want a perfectly smooth surface.

Reinforcing Against Movement

Like all solid timber, scaffold boards move with changes in humidity. Over time, this can lead to cupping or slight warping. To reduce this, add battens or bars across the underside, fixed perpendicular to the grain. Wooden battens are inexpensive and easy to attach with screws. Steel bars routed into the underside provide more strength but require more tools and expense.

Coffee tables are shorter than dining tables, so sagging is less of a concern. Still, adding reinforcement helps ensure the surface stays flat over time.

Sanding the Boards

Scaffold boards are usually rough, especially if reclaimed. Sanding is essential to turn them into a usable surface. Start with coarse grit sandpaper to remove dirt, paint, or marks, then move to finer grits for a smooth finish. An electric sander makes this process much quicker, but sanding by hand works too if you enjoy a traditional approach.

The goal isn’t to erase all character but to create a surface that is smooth to the touch and safe for everyday use. Leaving some marks and imperfections adds to the table’s charm.

Pilot Holes and Edge Treatments

When attaching hairpin legs, always drill pilot holes into the underside of the boards first. This prevents the wood from splitting and helps the screws seat properly.

For the edges, you can leave them square for a rugged look, round them slightly with sandpaper for comfort, or use a router to create a chamfer or rounded profile. Even a small amount of shaping can make the table feel more refined and pleasant to use.

Finishing the Table Top

Finishing protects the wood from spills and enhances its natural beauty. Hardwax oil is one of the best options, giving a matte, natural look while offering good resistance to stains. Danish oil and tung oil bring out the warmth of the grain but may need reapplication. For maximum durability, polyurethane varnish provides a tougher surface that resists scratches and stains, though it can create more shine.

Apply several thin coats, sanding lightly between applications. This ensures a smooth, resilient surface that can handle the everyday demands of a coffee table.

Conclusion

A coffee table made with scaffold boards and hairpin legs is a project that combines rustic character with modern style. The chunky, authentic boards bring warmth and history, while the slim legs add elegance and keep the design light. The result is a table that is both practical and eye-catching, able to handle daily use while adding personality to your living room.

With careful cutting, joining, sanding, and finishing, you can create a piece that looks professional yet retains the handmade charm that makes it unique. Affordable, stylish, and full of character, a scaffold board coffee table with hairpin legs is a DIY project that delivers both function and beauty.

Posted on

How to Make a Coffee Table with Birch Plywood and Hairpin Legs

A coffee table is the kind of furniture that quietly earns its place in the home. It sits in the middle of the living room, catching mugs, books, snacks, and laptops, while also anchoring the space visually. Because it is so central, its design matters. A well-chosen coffee table complements the room, balances practicality with style, and reflects the character of the home.

Building your own coffee table allows you to tailor it to your taste, budget, and lifestyle. One of the most rewarding yet approachable projects is a birch plywood top paired with hairpin legs. This combination is simple, modern, and versatile, creating a table that looks designer-made but is achievable with basic DIY skills.

The Style of the Coffee Table and Where It Belongs

Birch plywood is instantly recognisable for its pale tone, fine grain, and distinctive layered edges. It has a clean, modern character that suits a wide range of interiors. When paired with hairpin legs, the result is a coffee table that feels light and minimal. The steel legs provide a delicate framework that doesn’t crowd the room, while the plywood top adds warmth without heaviness.

This style is particularly at home in Scandinavian-inspired living rooms, where pale woods and simplicity are key. It also works in modern apartments, where space is limited and furniture must feel light. In creative studios or lofts, plywood paired with steel legs resonates with the industrial-yet-refined aesthetic. It’s a coffee table that doesn’t shout for attention, but instead complements its surroundings gracefully.

What Hairpin Legs Are and How They Work

Hairpin legs are crafted from bent steel rod welded to a mounting plate. Typically, they come in two-rod versions, which are sleek and minimal, or three-rod versions, which provide greater strength for heavier tops. Their design dates back to the 1940s but remains popular because of their simplicity and adaptability.

On a coffee table, hairpin legs are the perfect partner for plywood. They echo the clean, no-fuss aesthetic of the top while adding a touch of mid-century elegance. Slim but strong, they allow the plywood to take centre stage, keeping the table visually uncluttered.

Why Birch Plywood and Hairpin Legs Work Well Together

Plywood has a very different personality from solid hardwood. It’s engineered from thin layers of birch veneer, each layer’s grain alternating direction for strength. The result is a panel that is stable, flat, and strong relative to its weight. Unlike cheaper softwood plywood used in construction, birch plywood is smooth, uniform, and free of large voids.

When combined with hairpin legs, the table achieves a balanced aesthetic. The legs highlight the clean, architectural quality of the plywood, while the plywood offsets the industrial look of steel with warmth and subtle grain. Together they produce a coffee table that feels light, functional, and quietly stylish.

Choosing the Right Colour for the Legs

Hairpin legs are usually available in black, white, or raw steel. Black creates a striking contrast against the pale tones of birch, giving the table a modern edge. White blends softly with the wood, enhancing the Scandinavian feel. Raw steel adds an industrial touch but must be sealed with a clear coat to prevent rust.

For those wanting a more personal touch, the legs can be painted in any colour. To do this, lightly sand them to help the paint adhere, then spray or brush on your chosen colour, finishing with a clear coat for protection. This gives you the flexibility to match the table to your existing décor or make it a standout accent piece.

Why Birch Plywood Is Popular for Furniture

Birch plywood has become one of the most popular sheet materials for DIY furniture. Unlike construction-grade plywood, which often contains knots, voids, and rough veneers, birch ply is made entirely from birch, giving it consistency and strength. Its layered edge is often celebrated as a design feature, left exposed as a decorative element that hints at its engineered construction.

It has a fresh, contemporary look that appeals to people who want furniture that feels modern but not cold. It’s also affordable compared to solid hardwood, making it a practical choice for larger projects like tables.

Choosing the Right Thickness

For coffee tables, plywood thickness makes a noticeable difference. The two most common options are 18mm and 24mm. An 18mm top looks sleek and is strong enough for smaller tables. A 24mm top feels more substantial, resists sagging better, and gives the table a bolder presence. Because hairpin legs are slender, many people find that pairing them with the slightly thicker 24mm top creates a better balance.

The Realities of Using Plywood

While birch plywood is high quality, it isn’t flawless. The surface may include small patches or “plugs” where knots were removed, as well as occasional scratches from handling. These imperfections are part of the material’s nature. Some makers choose to embrace them as part of the table’s character, while others select their panels carefully to avoid prominent marks.

Another thing to consider is sanding: the outer veneer layer is thin, so sanding must be gentle to avoid going through to the glue layer beneath. This is less of an issue with solid wood but a reality with plywood.

Cutting the Top to Size

Cutting plywood requires accuracy. A circular saw can handle the job, but a track saw gives the best results, ensuring perfectly straight lines. Always measure carefully, mark clearly, and clamp the board securely before cutting. Birch plywood produces fine dust, so goggles, a dust mask, and hearing protection are essential. Dust extraction is also highly recommended.

If you don’t have the right tools, ordering pre-cut plywood panels from an online supplier can save time and effort. While this costs slightly more per square metre, it eliminates waste, mess, and the risk of miscutting.

Reinforcing Longer Coffee Tables

Coffee tables are usually smaller than dining tables, so sagging is less of an issue. Still, if you are making a longer table — for example, one over 120cm — you may want to reinforce the underside with a batten or “spine” running lengthwise. This helps prevent sagging over time, especially if you’ve chosen an 18mm board.

Positioning the Hairpin Legs

For stability and a balanced look, position the legs about 5–8cm in from each corner. Before drilling, check how the table will sit in your living room. If it will be placed against a wall, make sure the legs don’t clash with skirting boards. It’s also worth testing the layout to ensure the legs don’t obstruct baskets, footstools, or other items you may want to store underneath.

Sanding Birch Plywood

Sanding prepares the plywood for finishing. Start with medium grit sandpaper, then progress to finer grits such as 240. Sand lightly and always with the grain. Be especially careful with the edges, as the veneer is thin. Many makers choose to leave the layered edge visible as part of the design, but it can also be softened with sandpaper for comfort.

Edge Treatments

The edges of plywood are often a focal point. You can leave them exposed for a modern, architectural look, or cover them with edge banding for a more solid-wood appearance. If you prefer subtle shaping, a router can add a small chamfer or rounded profile, or you can simply ease the corners by hand sanding.

Finishing the Surface

A finish protects the wood and enhances its natural beauty. For birch plywood, hardwax oil is an excellent choice, providing a natural matte look while guarding against spills. Danish oil or tung oil bring warmth but may require more frequent reapplication. For tougher protection, polyurethane varnish offers resistance to scratches and stains, though it can create more shine.

Apply several thin coats of your chosen finish, sanding lightly between applications. This ensures a smooth surface that can withstand the daily wear a coffee table endures — hot mugs, snack trays, and the occasional spill.

Conclusion

A coffee table with a birch plywood top and hairpin legs is an ideal DIY project for anyone who values modern style, affordability, and practicality. The pale tone and layered edges of the plywood give it a fresh, architectural look, while the hairpin legs add mid-century elegance and prevent the design from feeling heavy.

With careful preparation — choosing the right thickness, cutting accurately, sanding gently, and applying a protective finish — you can create a coffee table that feels light, stylish, and durable. It’s a table that works beautifully in contemporary, Scandinavian, and minimalist interiors, and with regular care it will serve as a functional centrepiece in your living room for years to come.

Posted on

How to Make a Coffee Table with an Oak Veneer Top and Hairpin Legs

A coffee table is often the centrepiece of the living room. It’s where mugs of tea are placed, books are stacked, snacks are served, and remote controls always seem to end up. It’s a piece of furniture that gets used every single day, often in ways we don’t even think about. Building your own coffee table gives you the freedom to choose the look, size, and materials that work for your home while also giving you the satisfaction of creating something yourself.

One combination that strikes an ideal balance between style, affordability, and practicality is a coffee table with an oak veneer top and hairpin legs. This pairing combines the natural warmth of oak with the light, elegant look of steel, creating a table that feels modern and versatile without being bulky. If you’re looking for a project that is achievable for a DIY maker and rewarding in everyday use, this is an excellent option.

The Style of the Coffee Table and Where It Belongs

Oak veneer paired with hairpin legs has a distinctly modern character. The veneer surface gives you the look of real oak grain but with a sleek, slim profile. Hairpin legs, originally designed in the 1940s and strongly associated with mid-century modern design, keep the piece feeling light and airy. The result is a coffee table that doesn’t overwhelm the room but instead blends seamlessly with its surroundings.

This style of coffee table works beautifully in Scandinavian-inspired homes, where pale woods and clean lines dominate. It also fits well in minimalist interiors, where clutter is reduced and each piece of furniture must pull its weight both functionally and aesthetically. In modern apartments or smaller living spaces, the slim legs and lightweight construction prevent the table from looking too heavy. And in mid-century inspired interiors, hairpin legs pay homage to a design classic while giving the table timeless appeal.

What Hairpin Legs Are and How They Look

Hairpin legs are made from bent steel rod welded to a mounting plate. They come in two-rod versions, which are lighter and sleeker, and three-rod versions, which offer greater strength for supporting heavier tops. The simplicity of their design is what makes them so enduring. They are strong enough to hold substantial weight, yet their thin profile makes them appear almost delicate.

On a coffee table, hairpin legs are the perfect partner for a veneered top. Because veneer is slimmer and lighter than solid wood, the pairing works visually: a sleek top with slender legs. The table feels light and modern while still strong enough for everyday use.

Why Oak Veneer and Hairpin Legs Work Together

Oak veneer is made by slicing very thin sheets of real oak and bonding them to a stable core such as MDF or particleboard. This construction gives you the appearance of solid oak but with far less weight and cost. While solid oak can sometimes feel heavy, both in appearance and in handling, veneer keeps things lighter. Pairing veneer with chunky legs might feel unbalanced, but hairpin legs are the ideal match. Their slender steel frames complement the refined look of veneer, creating harmony between top and base.

The end result is a table that feels elegant without being fragile, modern without being cold, and affordable without looking cheap.

Choosing the Right Colour for the Legs

The finish of your hairpin legs can dramatically alter the overall look of the coffee table. Black is the most versatile option, giving a sharp, modern contrast against oak veneer. It works in almost any interior style. White provides a lighter, fresher look that feels especially at home in Scandinavian or coastal-inspired living rooms. Raw steel offers an industrial edge, though it must be sealed to prevent rust.

If you want something bespoke, hairpin legs can easily be painted. Lightly sand the steel first to help the paint adhere, then apply spray paint for a smooth finish. Once dry, add a clear protective coat to improve durability. This allows you to coordinate the legs with other accents in your living room, from light fixtures to shelving.

Why Oak Veneer Is Different from Solid Oak

It’s worth understanding exactly what oak veneer is and how it differs from solid oak. With veneer, the surface is genuine oak, so you get the natural grain and character. Underneath, however, is a stable substrate such as MDF. This engineered structure makes the board resistant to warping and movement, unlike solid oak, which expands and contracts with humidity.

The downside is that the veneer surface is thin — usually less than a millimetre thick. This means it can’t be sanded and refinished multiple times the way solid oak can. Once the veneer layer is worn through, the surface can’t be restored in the same way. That makes it less durable in the long term, but for many projects the trade-off in cost and stability is worth it.

Durability and Everyday Use

Coffee tables endure a lot of daily abuse. Hot mugs are set down, drinks spill, food is eaten from them, and feet sometimes rest on them. A solid oak surface would handle this kind of use for decades, as scratches can be sanded out and refinished. Oak veneer requires more care. Because the top layer is so thin, scratches or chips can be permanent.

That said, with a little discipline — always using coasters and placemats, wiping up spills promptly, and avoiding dragging heavy objects across the surface — a veneer coffee table can last many years and stay looking beautiful. If you’re the kind of person who likes to protect your furniture with mats and trays, veneer is a perfectly viable option.

Choosing the Thickness of Veneered Boards

Oak veneered panels are typically available in 18mm, 22mm, or 25mm thicknesses. For a coffee table, a thickness of 22mm or 25mm gives the right balance between strength and appearance. An 18mm board can work but may feel too light, particularly with slim legs. A thicker top not only looks more substantial but also resists sagging, even if the table is made larger.

Cutting the Top to Size

If you’re cutting your veneered board yourself, accuracy and care are vital. Veneer is prone to chipping at the edges when cut. To minimise this, use a fine-tooth blade on your saw, apply masking tape along the cut line, and cut slowly. A track saw is best for achieving perfectly straight, clean cuts. Always wear goggles, a dust mask, and hearing protection, and use dust extraction where possible.

If you don’t have the right tools, many suppliers offer veneered panels cut to size. This option costs slightly more per square metre but saves time and ensures perfect edges. It also reduces wastage and keeps your workshop or living room free of sawdust and mess.

Sanding Veneer Safely

Sanding oak veneer requires a gentle touch. Unlike solid wood, where you can remove several layers to refresh the surface, veneer is thin. Start with fine-grit paper, such as 180, and sand lightly with the grain. Avoid using a heavy hand or aggressive power sanding, as this could go through the veneer and expose the core material beneath. For edges, hand sanding is usually safest.

Attaching the Legs

Before attaching your hairpin legs, mark out their positions carefully. Legs are usually set back 5–8cm from each corner for stability and a balanced look. Once you’re happy with the placement, drill pilot holes into the underside of the board. This prevents splitting and ensures the screws go in cleanly. Attach the legs with wood screws of the appropriate length, making sure they don’t go through the top.

Edge Treatments

The edges of veneered panels often expose the MDF or particleboard core. You can leave them visible for a more industrial look, but most people prefer to cover them. The simplest solution is iron-on oak edge banding, which creates the appearance of a solid oak top. Alternatively, you can attach solid oak lippings for a premium finish. If you prefer a softer edge, lightly sand the corners or add a small chamfer for comfort.

Finishing the Surface

Finishing is essential to protect the veneer and bring out the oak grain. Hardwax oil is a popular choice, giving a matte, natural look while providing some resistance to spills. Danish oil or tung oil add warmth but may require periodic reapplication. For maximum durability, especially on a table that will see daily use, a clear polyurethane varnish offers the toughest protection against scratches and stains, though it may look shinier than oils. Apply several thin coats, sanding lightly between them for the smoothest result.

Conclusion

An oak veneer coffee table with hairpin legs is a stylish, affordable, and rewarding project. The oak veneer provides the natural beauty of wood grain without the cost of solid oak, while the hairpin legs keep the design light, elegant, and timeless. With thoughtful preparation — choosing the right thickness, cutting carefully, sanding gently, protecting the edges, and applying a strong finish — you can create a coffee table that looks professional and serves your living room well.

This style works beautifully in modern, Scandinavian, and minimalist interiors, where lightness and practicality are valued. While oak veneer won’t last as long as solid wood under heavy use, with care it can remain a stylish centrepiece for many years. It’s proof that you don’t need to spend a fortune to build a table that feels bespoke, modern, and made with pride.

Posted on

How to Make a Coffee Table with an Oak Top and Hairpin Legs

A coffee table is one of the most versatile pieces of furniture in the living room. It anchors the space, provides a surface for drinks and books, and often doubles as a spot to rest your feet. Building your own coffee table allows you to choose materials that fit your style, while giving you the satisfaction of creating something by hand. One timeless and modern combination is pairing a solid oak top with hairpin legs. The result is a table that is both strong and stylish, balancing natural warmth with slim, elegant design.

The Style of the Table and Where It Belongs

An oak coffee table with hairpin legs has a minimal yet inviting aesthetic. The slim steel legs give the piece a light, modern look, while the oak top adds richness and durability. This design suits Scandinavian-inspired interiors, industrial lofts, and modern family living rooms alike. It’s simple enough to blend into most décors, but striking enough to become a focal point.

What Hairpin Legs Are and How They Look

Hairpin legs are made from bent steel rods welded to a mounting plate. Originally designed in the 1940s, they remain popular today for their strength and mid-century appeal. Available in two-rod or three-rod versions, they support heavy tops while keeping a slim profile. On a coffee table, hairpin legs help maintain a sense of openness in the room while providing reliable support.

Why Hairpin Legs Combine Well with Solid Oak

Oak is a dense, durable hardwood with a timeless grain. On its own, it can sometimes feel heavy, but hairpin legs provide the perfect counterbalance. Their slim, refined form offsets the weight of the oak, resulting in a coffee table that feels substantial but not bulky. The pairing is a classic blend of rustic warmth and modern elegance.

Choosing the Right Colour for the Legs

Hairpin legs are available in black, white, or raw steel. Black is a versatile choice that creates a striking contrast with oak. White offers a softer, lighter look that suits modern or Scandinavian living rooms. Raw steel gives an industrial edge but must be sealed to prevent rust. If you want a custom look, you can paint the legs yourself. Sand them first for adhesion, then use spray paint for a smooth finish and add a protective clear coat.

Why Solid Oak Is Different from Cheaper Alternatives

Unlike veneered or laminated products, solid oak is consistent through its entire thickness. It can be sanded, repaired, and refinished many times, giving it a lifespan measured in decades. Laminates may imitate oak but chip easily and cannot be restored. Veneers have a real wood surface but only a thin layer that wears down over time. For a coffee table that sees constant use — mugs, snacks, remote controls, and daily knocks — solid oak is a worthwhile investment.

Choosing the Thickness of the Oak

Coffee tables don’t need as much thickness as dining tables, but the size of the top still matters. Common thicknesses include 19mm, 24mm, 27mm, and 30mm. Nineteen millimetres gives a sleek, modern profile, while 24mm and 27mm offer a sturdy, balanced feel. Thicker tops, like 30mm or more, look bold and chunky but add weight. For most coffee tables, 24mm strikes the right compromise between strength and appearance.

The Realities of Using Oak

Oak is a natural material, so expect some variation in colour and grain. Knots, medullary rays, and other natural features add to its character. If you prefer a cleaner, more uniform look, opt for prime-grade oak. If you like rustic charm, character-grade oak embraces knots and natural quirks. Neither is better — it simply depends on the style you want for your living room.

Cutting the Top to Size

If you plan to cut your oak yourself, use a track saw or a high-quality circular saw with a fine-tooth blade. Always measure carefully, mark clearly, and clamp securely. Oak is dense, so cut slowly and use dust extraction if possible. If you don’t have the right tools, many suppliers offer pre-cut oak tops, which save time and ensure accurate dimensions.

Preventing Movement

As a natural hardwood, oak moves with humidity. Over time, this can cause slight cupping or sagging. For coffee tables, which are usually smaller than dining tables, this is less of an issue, but you can still reinforce the underside with battens or bars if desired. These help keep the surface flat and stable.

Sanding and Preparing Oak

Sanding oak ensures a smooth surface ready for finishing. Start with medium grit paper, then progress to finer grits for a polished feel. Always sand with the grain to avoid scratches. An electric sander makes the job quicker, but hand sanding works well too, especially for easing edges.

Pilot Holes and Edge Treatments

When attaching hairpin legs, always drill pilot holes first to prevent splitting. For the edges, you can leave them square for a clean look, round them slightly for comfort, or use a router to create a profile. Even subtle shaping makes the table feel more refined.

Finishing the Coffee Table Top

Because coffee tables are used daily and often for drinks, a protective finish is essential. Hardwax oil is an excellent choice, offering durability and a natural matte look. Danish oil or tung oil add warmth but may require reapplication over time. For maximum protection against spills and stains, varnish or polyurethane creates a tougher surface, though it can look shinier. Apply several thin coats, sanding lightly between applications, to create a smooth and resilient finish.

Conclusion

A coffee table with a solid oak top and hairpin legs is a perfect blend of strength, elegance, and timeless design. The oak top provides natural warmth and durability, while the slim legs keep the look light and stylish. With careful preparation — choosing the right thickness, cutting accurately, sanding, and applying a protective finish — you can create a coffee table that looks professional, feels sturdy, and withstands the wear and tear of daily life.

This design suits a wide range of interiors, from minimalist and modern to rustic and industrial. It’s a project that combines functionality with style, giving you a piece of furniture that will remain at the centre of your living space for years to come.