Making your own dining table is one of the most satisfying DIY projects you can take on. It’s a chance to build something personal, practical, and stylish while saving money compared to buying ready-made furniture. A popular design for its mix of rustic charm and modern elegance combines scaffold boards with slim hairpin legs. This pairing creates a table that feels both substantial and light, offering warmth and character without looking bulky.
The Style of the Table and Where It Belongs
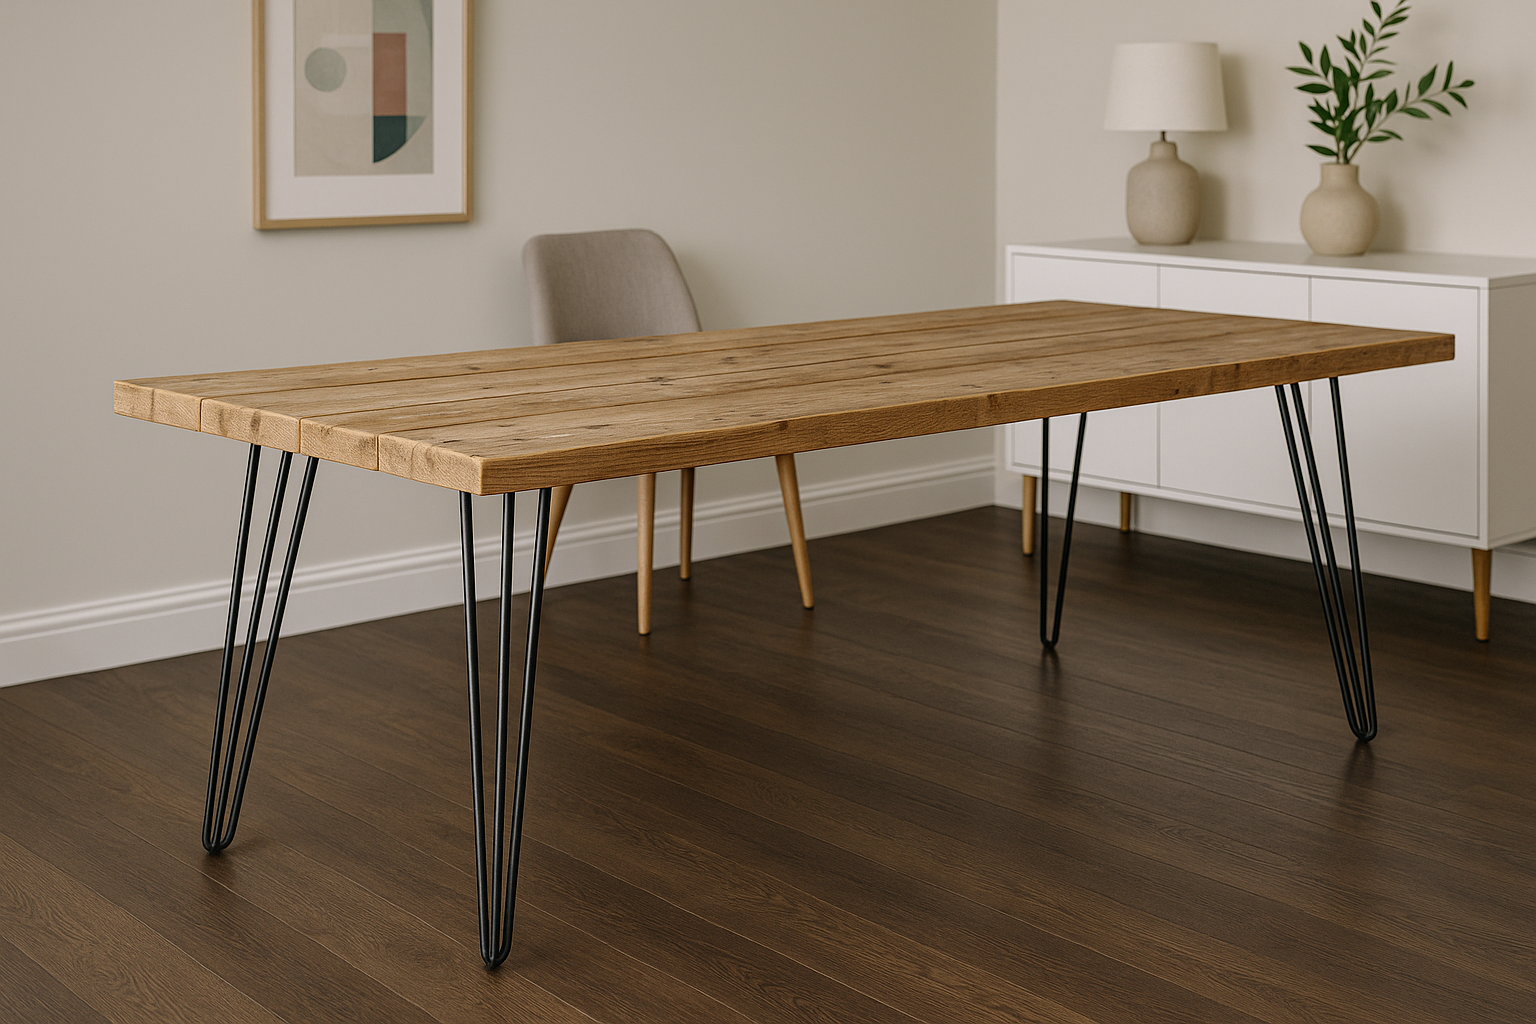
A dining table made from scaffold boards and hairpin legs has a unique style that sits comfortably between rustic and contemporary. The boards bring texture, history, and a sense of raw authenticity, while the slender steel legs keep the piece modern and airy. This kind of table works well in industrial-inspired lofts, eclectic interiors, and family homes where furniture is meant to be both practical and inviting. The rustic top makes it feel approachable, while the minimalist legs prevent it from overwhelming the space.
What Hairpin Legs Are and How They Look
Hairpin legs are made from bent steel rods welded to a mounting plate, usually in either two-rod or three-rod versions depending on the strength required. Their name comes from their resemblance to a bent hairpin, and their appeal lies in their slim profile and mid-century-inspired look. On a dining table, they provide strength while staying visually subtle, allowing the character of the scaffold board top to stand out.
Why Scaffold Boards and Hairpin Legs Work Together
Scaffold boards are chunky and rustic. Left on their own, they can sometimes look heavy and industrial. Pairing them with hairpin legs counterbalances this weight by introducing lightness and elegance. The result is a table that feels grounded and sturdy yet also refined. The contrast between rugged timber and sleek steel gives the table a timeless, versatile look that suits a wide range of interiors.
Choosing the Right Colour for the Legs
Hairpin legs are available in finishes like black, white, or raw steel. Black is the most versatile and contrasts beautifully with the lighter tones of sanded scaffold boards. White feels fresh and modern, particularly in bright, Scandinavian-inspired spaces. Raw steel enhances the industrial character but needs sealing to prevent rust. If you want something unique, the legs can be painted in any colour you choose — sand them first to help adhesion, then apply paint by spray or brush, and finish with a clear protective coat for durability.
Why Scaffold Boards Are Popular for DIY Tables
Scaffold boards are widely used in DIY furniture because they are affordable, accessible, and full of character. Originally designed for use on building sites, they are made from strong softwood planks, usually around 38mm thick and 225mm wide. Their chunky proportions make them well-suited to table tops, and reclaimed boards in particular bring dents, marks, and weathering that tell a story. New boards are also available if you prefer a cleaner look, but many people enjoy the authenticity of reclaimed wood.
Cutting the Boards to Size
Scaffold boards usually come in lengths up to 3.9m, so you’ll almost always need to cut them down. A circular saw will do the job, though a track saw or mitre saw gives cleaner and straighter results. Always measure carefully and secure the boards firmly before cutting. Safety is important: scaffold boards are heavy, so wear goggles, hearing protection, and a dust mask, and ideally use dust extraction to keep the work area clean. If you’d rather avoid cutting, some suppliers sell boards pre-cut to size, which saves time and effort though costs a little more.
Joining Scaffold Boards Together
To make a dining table top, you’ll need to join two, three, or more scaffold boards edge to edge. The most secure method is to glue the edges and clamp them tightly until dry. For added strength and alignment, you can insert dowels or biscuits along the joints, though this requires extra tools. If you prefer a simpler approach, you can attach battens across the underside to hold the boards together. This is quicker but may leave small gaps between the planks, which aren’t ideal if you want a perfectly smooth surface.
Reinforcing Against Cupping and Sagging
As natural timber, scaffold boards expand and contract with changes in humidity. Over time, this can cause cupping, where the edges curl slightly. To minimise this, you can add bars across the underside of the table running perpendicular to the grain. Wooden battens screwed in place are simple and affordable, while metal bars provide more strength but are more expensive and harder to fit. For longer tables over 150cm, adding a lengthwise batten or “spine” underneath helps prevent sagging in the middle.
Positioning the Hairpin Legs
When attaching the legs, position them about 5–8cm in from the corners for a balanced look and good stability. Before drilling, check that the legs won’t clash with skirting boards if the table will sit against a wall, and test the layout with chairs to ensure comfortable legroom.
Sanding the Boards
Scaffold boards often arrive rough, particularly if reclaimed. Sanding is essential to make them smooth enough for a dining surface. Start with a coarse grit to remove dirt, marks, and unevenness, then progress to finer grits for a polished finish. An electric sander will make this process much faster, but sanding by hand is possible if you prefer a more traditional approach. The aim is to create a surface that feels pleasant to touch and is safe for everyday use.
Pilot Holes and Edge Profiles
Always drill pilot holes before fixing screws into the underside of the boards. This prevents splitting and ensures cleaner results. For the edges, you can use a router to create a rounded or chamfered profile, or simply ease them with sandpaper. Even a slight rounding makes the table more comfortable to use and gives it a professional finish.
Finishing the Table Top
Finishing not only protects the wood but also enhances its natural grain. Hardwax oil is one of the most popular options, giving a matte finish that feels natural while providing good resistance to spills. Danish oil and tung oil also bring warmth and depth to the wood, though they may need reapplying over time. Varnishes and polyurethanes offer the toughest protection, making the surface resistant to stains and scratches, though they can sometimes look shinier than oils. For best results, apply multiple thin coats, sanding lightly between applications.
Conclusion
A dining table made with scaffold boards and hairpin legs strikes the perfect balance between rustic authenticity and modern elegance. The rugged, characterful boards give the table warmth and history, while the slender steel legs keep the design light and versatile. With careful preparation — cutting, joining, sanding, and finishing — you can create a table that is strong, stylish, and unique.
This style is perfect if you want a dining table that feels personal and full of character without breaking the budget. Whether you use reclaimed boards for their story or new boards for a cleaner look, combining them with hairpin legs creates a piece of furniture that looks timeless and feels welcoming — a table ready to host countless meals and memories.
